Question
WOODWEB Member:
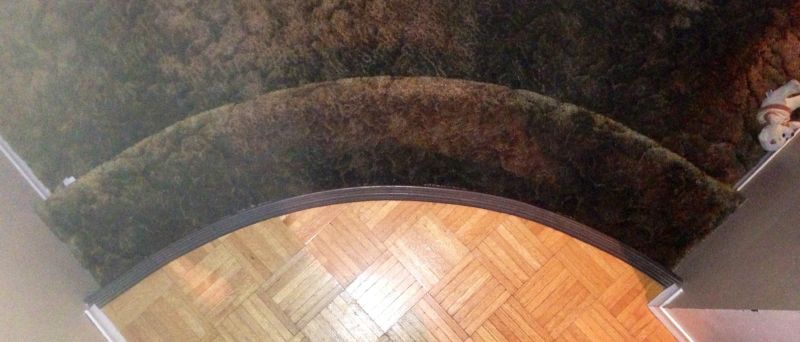
I have been asked to make a radius stair tread. Here is a photo of the current stair. Any suggestions?
Forum Responses
(Architectural Woodworking Forum)
From contributor D:
Can you make it in three segments and use a finger joint between the segments and then rout the whole thing round? Just a thought. I would laminate the wood in 2" strips first in a slab, then cut the segments from that.
We ripped rift white oak strips out of 6/4 and bent them on a form with plastic resin glue, then sent it all through the planer, bullnosed it and shipped. The radius allowed us to use 1/2" strips. When complete, they looked like one piece rift treads, and more than one observer thought we steam bent it as one piece.
An alternate method would be to do it all in 1/8" thick shop veneer, on both sides with a stable core, and a solid nose added and bullnosed. This will eliminate any cross grain movement.
Fabulous bent and match-laminated treads are not part of traditional stair joinery. Bent treads, threshold and bent-laminated handrail belong together in the new stair book.
May I say that the upper flooring (with its cheap, bendable threshold) needs to be addressed. It makes no sense to install a single, wonderful tread unless it's part of the whole picture.
I agree that the rubber moulding at the top should be addressed. In time that will be the case I expect, but at this time the customer wants to address the tread only as they are putting a new floor in the sunken living area. They are getting rid of the carpet and going with a good quality laminate flooring.
We do a fair amount of radius casings in which we do strip lamination. We use very thin strips (3/16" to 1/8") typically to minimize spring back and for long term stability in our curves, but most casings are only 2-3/4" to 3-1/4" and even at that size we often have 20 to 24 strips, so the blank is larger and then can be cut out using the router for precision. This tread would need to be about 13" deep. That would be a lot of strips to glue up!
I like the idea of quartered/rift for stability. I had not thought of that. Good idea.
Yes, there are lots of strips involved, and a high waste since so much wood goes up the pipe. We would do them in 3-4 glueups, lots of hands, lots of gloves and clamps all ready. Often, a strap clamp was the best clamp since it avoided flat spots.
Whatever you do, offer them a deal on oak nosing as contributor J mentioned. That rubber will look like $20.00 tires on a Maserati next to the new tread.