Railing to Newel Transition
Advice on turning and terminating a handrail at the upper newel post. April 4, 2011
Question
How would you transition this stair railing to the newel? As shown with a level turn, seems odd with the angle. I don't think I have room for any other fittings? Or do I just have to bracket it? I'd prefer tying the rail into the newel without a bracket if I could.
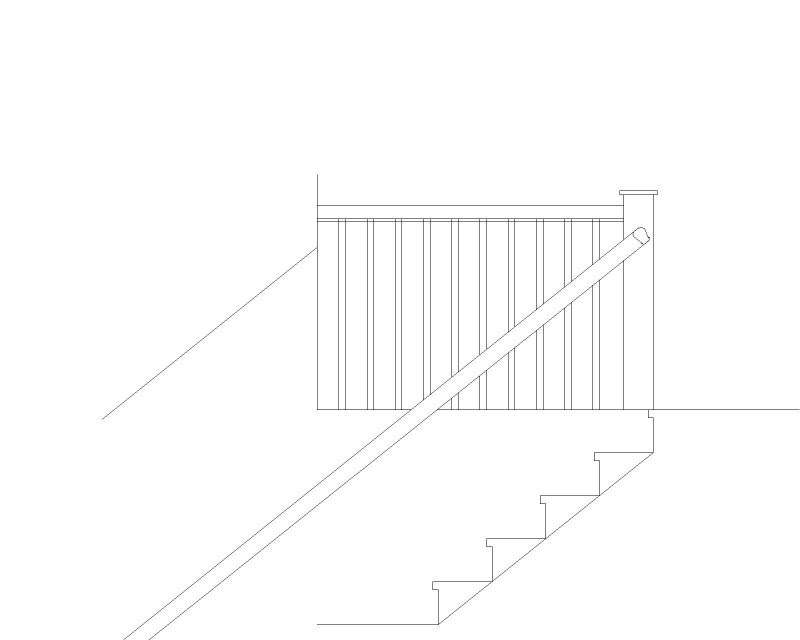
Click here for higher quality, full size image
Forum Responses
(Cabinet and Millwork Installation Forum)
From contributor T:
It looks like you could level out and wrap around the adjacent face and return into the middle of the newel there, if you have enough clear opening on the landing. You might still have to use a bracket, but I think it would look much better.
From the original questioner:
Thanks. That's an idea that would look good, but unfortunately space is limited to the right of the newel.
From contributor J:
The handrail (by code) must be returned to the newel post. You just can't place a bracket underneath and leave the handrail end open. That would present a clothes hook at the top of the stair. Wall mounted handrails must now be returned both at the top and bottom of the stair.
You're right about a rake-angle return looking odd. Level out first with a bisected miter angle or an over easement and then return to the post. You could also install a vertical gooseneck, bringing it up to the balcony rail height and then returned.
In most cases, the return is either a cut mitered joint or a quarter turn fitting. The fitting is usually best since it presents no sharp handrail corners. Either way, you must stay within the allowable rake rail height requirements.
The prettiest method is perhaps a wreathed (a carved, one-piece) rake/level turn brought to the same height as the balcony rail. That would involve a bit of coordination as to the rake and level rail heights and the position of the newel post (as well as the wreathed rail fitting).
A wall mounted full-round handrail is another idea and sometimes looks best. Any raked returns of a round handrail profile can't be out-of-level. Well, that's a lot to say about a simple problem but I've learned that with stairs and handrails, nothing is ever simple.
From the original questioner:
Thanks for the thoughts. I think the gooseneck at the balcony rail height, then mitered into the rail, will work and look good. At the bottom, the wall ends flush with the first riser. Would you typically just bracket this end to the wall? Thanks again - I'm a cabinetmaker doing the kitchen for the client, and the railing just got added on. I've only done a few in the past, so I'm not at all familiar with the tricks.
From contributor J:
You must return the handrail to the wall. Go ahead and miter it and call it done. If you want a softer corner you might use a 135 degree return instead of 90. Just cut the joint ends of the rail at 22.5 degrees and the wall mounted end at 45. With this kind of return you'll be able to run a screw through the side of the rail and into the corner stud. Plug and sand the screw hole and add the required brackets. An installation like this should ensure that the wall handrail remain rigid, while brackets alone sometimes work loose. If you are using cut-mitered joints returns, they should also be glued and screwed (as I've described) and not just nailed. Take proper care to get everything firmly fixed and code-compliant. Check with your local building inspector if you're unsure about anything. Liability is a big issue when it comes to stairs and handrails.
From contributor L:
Contributor J's suggestions are right on as usual. I'd only add to make sure the railing clears everything by 1 1/2 inches; including the skirt and nosing on the second floor (which you don't show in your drawing). Sometimes this means running a jog in the handrail downstream a bit from the upper balcony skirt.
You'd find most of these layout issues become quite obvious by drawing these areas full size in at least plan and elevation views. Love computers, mind you, but I'm not about to retire my pencil and paper... and, oh yes, the most important tool, my big fat (and well-used) eraser.