Sanding Edges
Sometimes, too much finish gets removed from edges during sanding between coats. In this thread, finishers suggest possible remedies. October 18, 2005
Question
When sanding between coats of lacquer, I use an abralon sanding pad, but since it is on foam, it tends to sand the finish off the edges. Any way around this? Only hand sanding or just orbital, but no foam backing?
Forum Responses
(Finishing Forum)
One way around it would be to be more careful around the edges. Look into the amount of material you are putting on the surface. If you're lightly sanding and still cutting through the edges, you might need a bit more material on the surface you're sanding. Just because I'm not a fan of the sanding sponges doesn't mean they don't have a spot in the finishing shop. I personally like a Porter Cable 1/2 sheet sander or a 1/4 sheet speed bloc with 280 silicone carbide paper, and I rarely ever sand through an edge. I apply two coats of vinyl sealer and sand it thoroughly the following day. Since I'm never in a hurry to complete a project, I don't mind the wait.
Before coating the surface, burn in a coat around the edges first. When sanding, it is not necessary to get aggressive around the edges until you're close to the final. I tend to come in from behind in short strokes that meet the edges and level them, and then I go for the longer strokes across the surface. I like using what I call a Swiss cheese. It's a sanding pad that can be purchased at an automotive paint shop. It's a quarter inch pad, 4x5 or thereabouts, flexible and easy on the hands, great for creeping up on edges, and sells for around four bucks. It's the only sanding pad they make that has a series of holes in it. An auto shop painter turned me onto this.
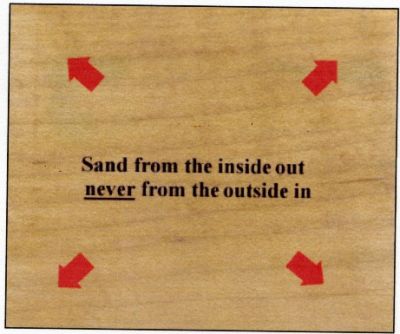
Try sanding from the inside of the wood to the outside. In most cases, a light scuff sanding is all that is needed until you have enough coats to machine sand, if that is really needed. You also may want to try using a finer grit sandpaper.

Surface tension makes it difficult for lacquer to go around corners - it tends to shrink away from edges, so the coating is thinner there. I combat this two ways (besides proper sanding technique).
1) I ease the edges well in my preliminary sanding, cutting down sharp edges.
2) I make sure to spray the edges on a bit of an angle, and follow through my spraying doors, etc. right off the side of the board, ensuring a full coat right up to the edges. Sometimes it looks a bit thick around the edges at first glance, but when the product cures it shrinks back.
Also, no foam sanding - 400 paper on a block only.
Everyone has encountered this, but the only solutions ever offered are those that involve adapting your finishing techniques. Anybody ever thought that some of this phenomenon is from the sanding being done before the wood comes to the finish room? Those tendencies to stay away from the edges when sanding don't just happen after a coat of finish is applied. The better the surface preparation, the better the final product. I know most probably think you could teach a monkey to run a sander, but the truth is a little 5 inch orbital can do a whole lot of damage in the wrong hands. Rolled down edges can happen, too, if not careful. Also, look for minor (or major) cupping.
My sanders have felt instead of foam. Seems the foam would have a little more give and curl around the edges.
This is a very common problem and the idea of avoiding the edges is one solution. Abralon is similar to what is called an interface pad in automotive refinishing and these are used so that you can sand the rounded contours of a car without cutting into the paint. However, on a flat surface they creep around edges and do exactly as you state. The best solution is to use micro-finishing film on a hard pad and go around the outside of the piece first. The best setup for this is a Stuhr or National Detroit dual pad straight line sander (I use the ND 300A). Then use the Abralon on the interior and never let it overhang the edges.
From the original questioner:
Well, at 600-700 for this sander... That's a bit out of reach at the moment. I get the general idea here, though.
This helps us a lot... In the workshop, we use sanding blocks we make up for final sanding on some of our laminate edge corners as a final treatment. We have a long wood block with the paper bonded to the block. It gives us a clean line and greater control on the final edge.
Each week, I make up some smaller wood blocks for the paint shop. I cut full lengths of chip or MDF at a width that fits the hand, then spray contact adhesive on them and lay out a line of sandpaper from our roll onto the boards, making sure it's flat to the board and no crinks are in place. Then I simply cut the boards up into short hand sander lengths. The sanding boards are totally stiff and flat, the paper is totally bonded and can't have any tendency to wrap around or over the edges. The only thing the person who is sanding has to do is make sure they keep it flat to the surface and stroke from the inside out to the edge or run it along or down the edge. They also work well in one circular motion. We find them great for the edge problem!
