Shaping with a Table Saw
Lacking the machinery to run a large moulding, a woodworker spends a few hours using his table saw to cut the curve. May 28, 2010
Question
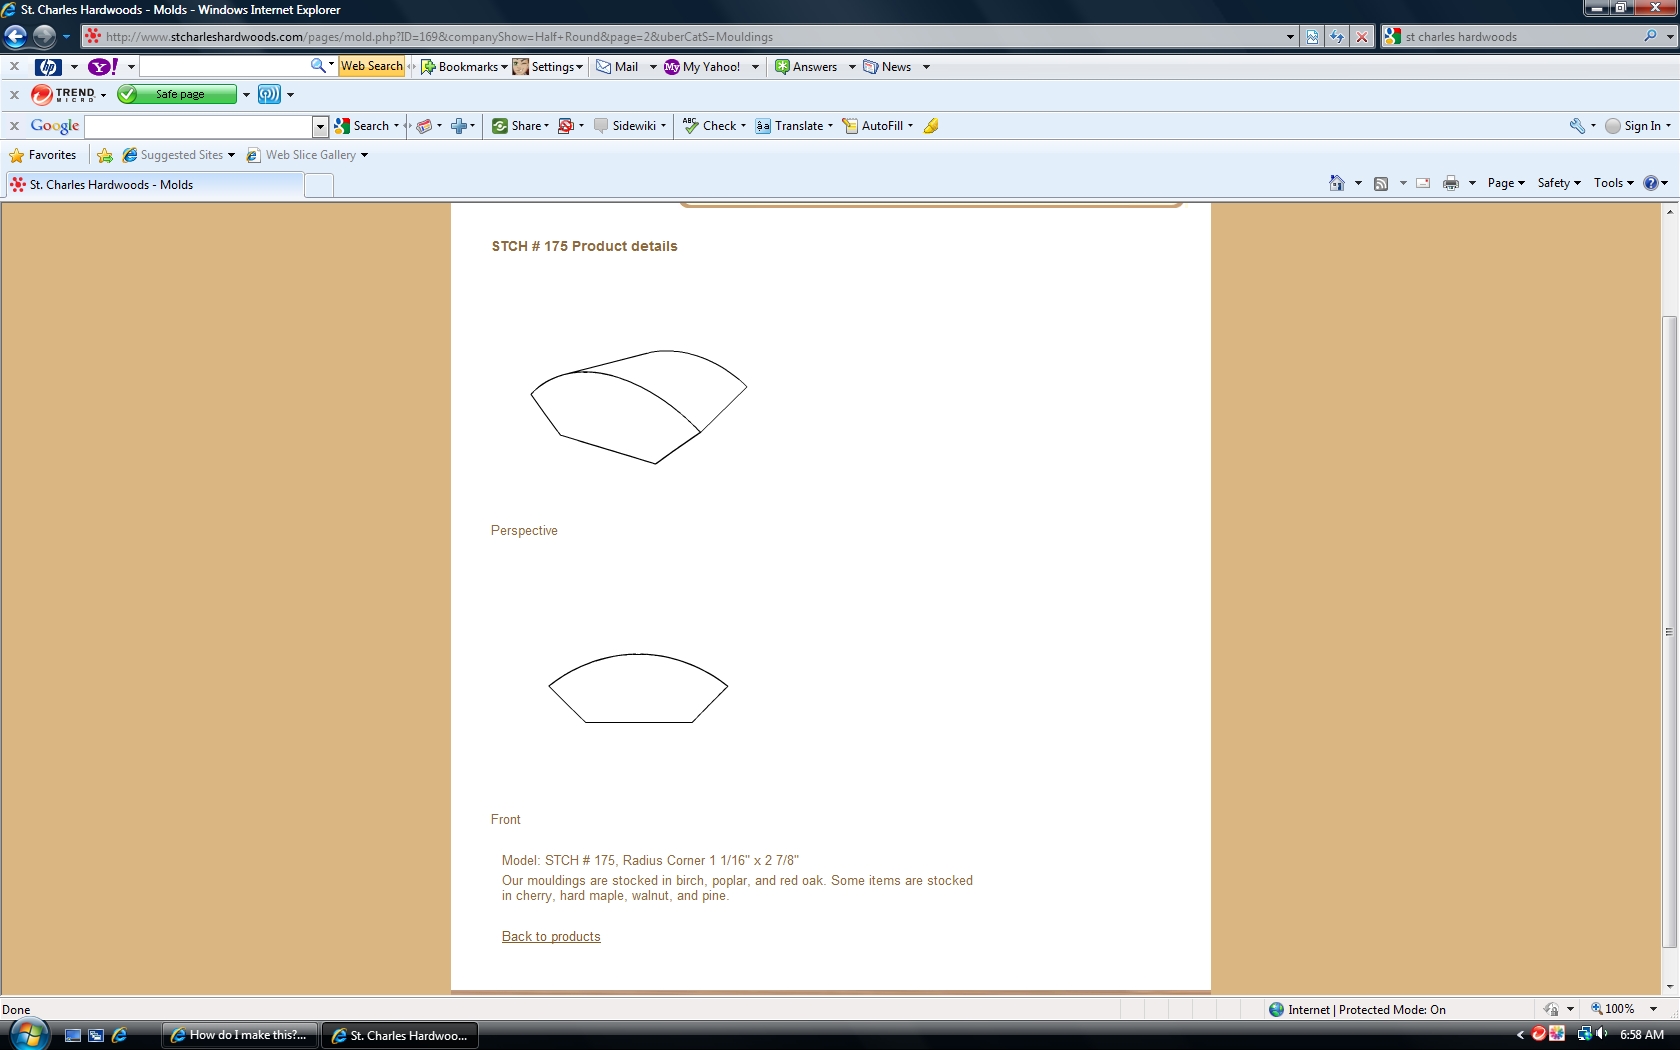
I have a piece of 1 1/2" birch that needs to be shaped to the shape shown below. It's an 8' length. Does anyone have any ideas on how to get the 3" radius on top? I don't have a moulder or a shaper but I do have a router. I have a couple of ideas but I don't want to poison the water.

Click here for higher quality, full size image
Forum Responses
(Cabinetmaking Forum)
From contributor P:
Find a shop with a lathe, turn a piece to the desired radius and cut away the back. If you don't want to involve another shop, perhaps you could belt sand the radius and then cut away the back.
From contributor F:
The only stationary machine I see that can will be any help to do this without a profile cutter would be a table saw. Make a pattern from a thin material and after squaring both ends of your blank, mark the profile boldly on both ends of the blank. Use the table saw blade height and fence setting to nibble away the profile. Start by setting the saw height and fence to cut just under the profile line on an edge. Each time you set the fence and blade height you can run two passes. One from each edge (provided you centered your profile pattern marking).
Make your numerous setups so that they leave about a 1/32" to 1/16" rib of wood remaining between saw cuts in enough areas so as to continue to support the blank. When you get to the center of the blank you are finished on the saw. You will be able to break off the thin blades of wood remaining between cuts with your hands. Now comes the hand work of smoothing with chisels, planes, scrapers and sanding blocks. If no hand planes the job can be finished with sand paper.
From contributor T:
I'd build it with my fax machine. Send the drawing over to my molding supplier, bill my client for whatever they charge, never look back. Any other way looks like a surefire time and energy killer.
From contributor F:
Set your table saw fence so the blade tilts away from the fence. Cut the end of your piece square and draw the profile on the end. Put your piece on edge in front of the blade and eye the blade against your profile. Set your blade angle for whatever starts to cut a facet at the top of the curve (i.e., two or three degrees). Run the piece on edge through the blade, flip end for end, and run the other side. Eye the blade against the profile for the next facet, tilt the blade a few more degrees, move fence in and repeat the process. Lather, rinse, repeat. You want the facets close enough together to facilitate sanding when you are done. Imagine as if you are sawing a multi-faceted polygon in an eight foot length. When you are done with the centadodecagon, or whatever it is, lay the piece on its back and run through the saw at whatever angle the back cut is on the molding (looks like 45 degrees). Sand it and sell it. Hopefully you only have to make one of these. Shapers with proper tooling make short work of such items, and might be a worthwhile investment if you get more work like this.
From contributor L:
1st recommendation, sub it out to a millwork shop. It will be cheaper than your time. 2nd if you get much of this kind of work get a quality 1 1/4" spindle shaper and power feed, learn how to grind knives. This is one of the best early investments I made. To get nearly machine quality with the table saw you could cut all the facets and then make a scratch stock or shaped sanding block but the entire process will cost you a lot of time.
From contributor B:
We have an old Foley Belsaw planer/molder and it works wonders. For this job we would have one knife cut to the profile (around $80) put it in the Foley and in two minutes you would have a finished piece requiring only a little sanding. You can find used Foley's for around $3-400.00
From contributor S:
If you don't want to sub this out and want to use your router you could build a router sled (similar to a sled you would build to plane a wide board). Instead of attaching the router to the two flat stretcher that connect the runners of the sled, you would connect the runners with two pieces of wood with an arc that will produce the desired radius. The router moves on top of the arced stretchers and planes your wood down to the correct radius. Don't forget to account for the depth of the router bit cut when making the arced stretchers. The stretchers will not have a 3" radius. The 3" radius will be at the tip of the router bit not at the base of the router.
From contributor U:
Will this work?
Click here for higher quality, full size image
From contributor L:
You might find a 3" round post a bit small! Try 6", although it�s probably expensive. The router sled seems like an ok idea if you can't stand millwork shops.
From contributor R:
For a one-off and if it is supposed to be a faceted radius mill it with a hand plane, be done and get paid. It shouldn't take more than an hour or so.
From contributor M:
A good moulding supplier will have that knife or something close enough. They will have the whole deal done in an hour or so and it will be accurate. Pay the $300-400 set up and add your markup and use your time and effort doing what you do best.
From the original questioner:
Well, I did it. I used my table saw to size up a blank that was the exact dimensions of what I needed. Then I started nibbling away at the radius - 1 degree at a time. I made a total of 70 cuts on the table saw. This left me with a piece that was so multifaceted that it required very little scraping and sanding. The end result is a piece that looks identical to anything produced in a milling shop (maybe even cleaner). I spent about three hours total and saved the $300 set up fee. Thank you all for your suggestions. They were all very helpful.