Question
I have a customer that wants a mahogany island top built. Specs are 108" x 42" x 2" thick. I've got a source for some really nice 8/4 African mahogany and I want to use 5-6" boards to do my lay-up. This top, however, will sit on an island base that measures 84" x 27." So the front working edge of the island will have a standard overhang, say 1.5", and the back and two ends will have around a 12" overhang on those three sides. I am wondering if the top will remain flat and true with just the few corbels along the back side of the bar with the overhangs I have. I've never done a top of this size with overhangs on 3 sides.
I was considering drilling through each strip on edge, say every 12" or so, and installing a long threaded steel rod and actually bolting the entire top together. Then just plugging the holes on the worktop edge. Could even be a contrasting wood to make it stand out. I have a bunch of the Go-Bolt material left over, so it's no expense to me, as it's slowly been used for jigs. Any input? I hate to test new techniques on customers, but it seems like it should work.
Forum Responses
(Furniture Making Forum)
From contributor N:
I wouldn't bolt it together. I'd think that restraining it that way would invite eventual compression failures and cause cracks to develop. My bet is that it will be fine with corbels; just make sure whatever fastening system you use allows it to move seasonally.
Of course if you knew which way the top might cup, you could route a curved channel into the top and have the threaded rod act like a truss rod in a guitar neck. With access to a nut which would increase or decrease tension on the rod to counteract movement. Personally I think the engineering involved in something like that would be overkill and more work than it's worth.
I think it's more important that the wood is properly dried and that the installation is done correctly. The top will rest on corbels, but it still needs to move. So you've got to figure a way to fasten the top to the corbels and still allow it to expand and contract seasonally. I would fasten the other end with the 1-1/2" overhang in place.
On a positive note, I made a 1-3/4" thick SA mahogany top for my kitchen over a year ago and it has been more stable than I expected. No detectable cupping or anything between seasons. I just fastened the back edge in place and the front edge is fastened through slots allowing it to move. Seems like a very stable wood from my experience.
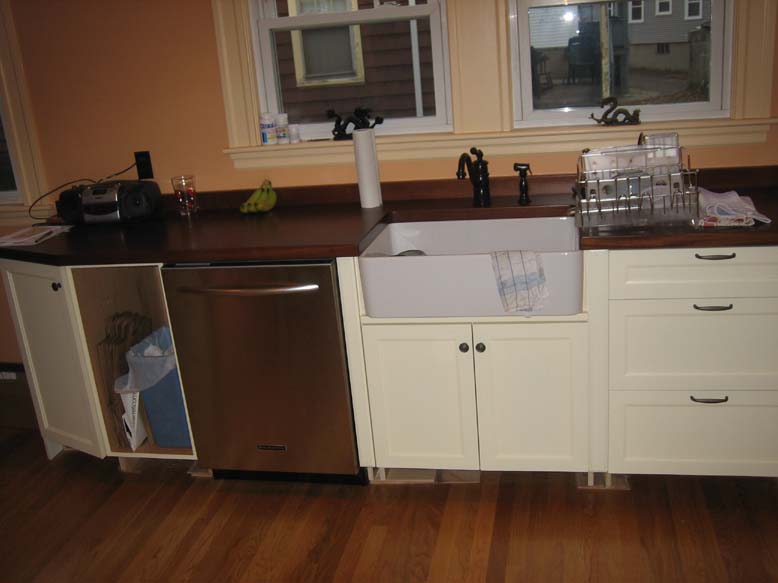
The c-top surrounds the sink. The finish was a CV finish from Target which came highly recommended. Having used it I would not recommend it, though. We were entertaining guests shortly after the kitchen was installed and had an accident. A placemat that had been used under the blender (to protect the c-top) was left overnight. What we didn't realize was, although our guests helped us clean up and the counter was clean, there was rum spilled under the mat that hadn't been cleaned up. The next morning when we resumed cleaning, we found the finish pretty much destroyed. Lesson learned.
It's now been over a year since the install and for the most part the rest of the finish has held up very well. However there are a couple very slight haze marks in the grain directly under the faucet and under the drip tray. Most people would never notice but you know how that is! Surprisingly the end grain around the sink is still like new, not a bit of wear showing there. Obviously the alcohol was more than the finish was designed to withstand, but the thing I'm bothered by is the hazing under the faucet. Next countertop I'll be looking for a more durable finish.
The last thing I'll say is that you really cannot see the beauty of the top in these pictures. One of the things I love about the SA mahogany that some of the other mahoganies don't have is a depth to the grain - with finish, it's slightly iridescent. I used a couple coats of amber shellac over the stain to really pop the grain. And when you look at the counter, (especially when wet), it's just amazing. I'd do it again in a heartbeat - I'd just use a different finish next time.
The first picture is in the spray booth.

This picture is the counter installed. The radio on the left is now a permanent fixture hiding the damaged area. Obviously still have some work left to do to finish the kitchen, someday!
In case you're wondering why I didn't re-finish the top, it was just too much to do at the time. The stain was a custom mix applied in three coats, followed by 3 coats of shellac to add depth and a slight amber tint, and finally 4 or 5 coats of CV. Basically it took me a solid week to finish the first time, so the thought of removing that finish and re-applying again, not to mention actually moving a top that big, was just too much. Not to mention having to deal with the wife not having a counter again!
One comment I have about the CV that you used, and was damaged. You said that it was shortly after installation. Was it within the 30 day window after the final coat of CV? I have heard that a number of products will take a full 30 days to cure. Since you said the rest of the finish has stood up pretty well during the past year, I wonder if the CV wasn't completely cured when the accident happened.
I'm curious about the steel rod myself now. I still think it's problematic, as if it's bolted tight for strength, it will restrict the movement of the wood. If it's not bolted I don't see how it adds any real strength, but then again I'm no expert so this is just my thinking out loud.
As for the corbels, just like any other top, you have to allow just enough slack in the fasteners to allow the wood to move. You don't want them to be loose, just not tightened too much. The trick is going to be figuring out just how to make that attachment.
How will you flat sand this large top?
I've done the steel rod thing before. It's a lot of extra work and only worth it to me if the part is structural or at risk of coming apart. This shouldn't be at that kind of risk at all.
I've done a top with a Waterlox Tung Oil finish and it was easy and turned out looking good, but I didn't do the rum test on it mentioned above.
Comment from contributor A:
I would heartily agree with contributor W - to make a work surface of this size out of solid stock is both a waste of premium material and a recipe for problems resulting from wood movement. If the client wants a planked look, choose your widest board and resaw it into less-than-1/8" thick veneers. Build the work surface as a torsion box, then veneer it with your show wood. Be sure to cover both sides with the same species for balance. As contributor W said, it'll save your back, your material, and will be dimensionally stable. As an added bonus, a torsion box will easily handle the 12" overhangs with little or no additional support.