Techniques and Equipment for Long-Grain Miters
Cabinetmakers who like to miter their face frames to their end panels discuss table-saw and shaper setups, joinery, and gluing techniques. September 28, 2006
Question
We miter the long grain on all of our face frames to our end panels. We've developed a pretty good way to join the miters, and we have a better way under development. We've chosen to stay with a simple miter butt joint rather than a lock-miter because our materials on each side of the joint are often different thicknesses. My question is about the shaper.
We currently use a 4 inch diameter carbide cutterhead from LRH Tooling and drive it on a 10HP SCM shaper with a tractor belt power feed. We can miter a stick as small as 1-1/2 cross grain. I think this shaper is way overkill for the job and if I could get one with a smaller footprint I could locate it to a better spot in the shop flow. We will be cutting poplar, cherry, maple and oak. A typical thickness of material would be 1 inch with a cross-miter dimension of about 1-1/4. The 10 HP shaper does this nicely with one pass. I have a 5 HP Chinese shaper that I use with stacked cutterheads for door sticking. This shaper has enough power to make cut and groove and ogee profile but I suspect it would bog down if it had to remove as much material as the miter would require.
What do I need to look for in evaluating power for a shaper? Is a 5HP rating on one machine the same as a 5HP rating on another? After adequate power, footprint is my biggest concern. I don't much care about the ability to raise or lower spindles, or adjust fence positions. I just want to turn it on, stick the board in and go to the glue up station. I'd like to do this for under $2000. Does anybody have a suggestion? I realize now that I do have some specific questions. Is 5HP on one motor the same 5HP on another, or is this rating subject to some other index, such as no load etc.? Does the transmission system between motor arbor and spindle arbor make a difference in power, i.e., flat belt vs V-belt; two belts versus one?
I believe that a 1750 motor has more torque than a 3450 motor. Would I get more power transmission if I started with the slower motor then ramped the speed up with a larger pulley diameter? If I end up with an import, is a General Shaper better than a Chinese made Oliver?
Forum Responses
(Finishing Forum)
From contributor A:
The only specific question I can answer is that motor manufactures do get creative with amp and horsepower ratings on tool motors. A good electric motor shop can tell you what the differences really are. I make mitered face frames also, so I want to tell you what I have learned.
I like to saw my miters with a power feed on the table saw. I use the type of setup where the tip of the blades teeth are buried in a sacrificial fence that is attached to the regular table saw fence. This way, parts of equal thickness but with any different width can all be mitered on the same setup. There is a rabbet at the bottom of the sacrificial fence to give clearance for the triangular off cut so it does not bind and shoot out of the saw. The saw is set to where the parts are beveled just to the face without removing any of the parts width across the grain.
I use a high quality combination style blade with 60 carbide teeth. The quality of the glue joint surface is excellent and will be as strong as a machined surface such as the one you are getting on the shaper. The other thing I learned in my operation is that it is easier for me to join the stiles to their frames before I miter them. My frames are dowelled together and when I miter the parts before I glue the individual frames together, it creates a clamping problem because of sharp corners and protecting those sharp corners from being crushed by the clamps.
Now, I first build the face frames and side panels as complete assemblies and sand the faces flush. Then I make my saw set up and power feed the frames through the saw with the stiles that get the miters riding against the fence. In your case you would need to change the setup for the occasions that you said when the face frame and the end panels are two different thicknesses. It requires much less horsepower to make the saw cut than to machine the miters with a shaper cutter. Also one blade can cut both 45 degrees and 22.5 degrees if need be instead of needing a separate shaper knife for each separate angle you made need on a project.
From the original questioner:
To contributor A: Thanks for the step by step tutorial. This is a great way to make long miters. I think you should post a picture of your set up with the blade buried into the sacrificial fence - particularly the part about the rabbeted area to minimize bind and kickback. We had a Unisaw set up similar to what you describe. We would use this to get the material close to size and then clean it up with the shaper. The advantage of the shaper over the saw is that it indexes with the "A" face against the table. Variations of material thickness did not matter.
A few months ago we added a Tigerstop to the sliding side of our Altendorf. This extra dimension caused a ripple effect that made the Unisaw set up have to move. Someone brighter than me suggested we try making all of the cuts on the shaper and the rest, as they say, is history. I guess the important lesson here was to always challenge your assumptions. Your system is a great one for a shop that doesn't have the space or demand for a dedicated shaper. I think you should photograph how it works so the other guys can see.
From contributor B:
I have been doing a tongue and groove type lockmiter for 20 years on face frames to end panels on the shaper. A 5 HP shaper is fine in anyone�s HP rating. I use the lockmiter design from Freeborn, # pc28-020 that looks like a single tongue and groove. I mill both matching surfaces with the tongue on the shaper, then go to the table saw and cut the matching groove in the appropriate half of the joint, subsequently removing the tongue on that piece. I set the cutters on the shaper so the tongue of the joint is flush on the bottom side with the face of the shaper table. This makes it possible to simply adjust the fence for changing material thickness even when you are joining 2 different thicknesses in one joint. I prefer to cut the groove side of the joint in the end panel parts so I can register the shoulder of the groove to the front edge of the fixed cabinet shelves. I prep all the face frames just as contributor A does, widebelt sanding just before shaping the lockmiter.
From contributor A:
I think the hard part is convincing someone that is isn't necessary to have a planed or machined surface on a miter. Probably if the two joints (sawn and planed) were tested for strength, the sawn joint would be stronger because of the key that the saw striations provide for the glue�s grip. I don�t mean you particularly though because I believe you want to go the shaper route to save on floor space for a permanent setup.
If you are using the shaper with a support table or sawhorse so that the frames can be assembled before the bevels are machined, it is the same as my method with the exception that because the cutter was designed to run the parts face down, you can bevel differing thicknesses of material with a single elevation setting. Please understand I am not saying your system is flawed. My shop does have shapers. I just don�t personally find it worthwhile to buy a dedicated shaper with enough horsepower to machine bevels into thick hardwoods in one pass when the table saw does the task easily with a 3 horse motor. I also do not need this set up to be as available as you do, as in dedicated.
As to the setup change for different thicknesses, it is a change in the saw blade elevation that takes two or three minutes to reset. Again I want to say that I don�t argue with your need to have this set up ready to go all day long every day as with a dedicated setup. You obviously do a lot of this or you would not want to make the investment in the extra shaper and knives.
From contributor A:
Contributor B�s method has an advantage over mine in that he has a tongue for alignment. I have to add a few biscuits strictly for alignment purposes to keep the miters from slipping during glue up. I mention this so newer woodworkers understand that a long grain miter needs no added strength that the biscuits may provide. Contributor B has the added step of the table saw pass but it still seems faster than the time involved in making the biscuit slots and then biscuit glue application time.
From contributor B:
The one main advantage I see with the lockmiter is the ease of gluing the joint. The tongue and groove makes the alignment perfect with ease and certainly takes no longer to set up than the tablesaw. But it's a matter of choice and economics if you want to set up a dedicated machine for this joint.
From contributor B:
I also am already set up for the 1/4" groove for the lockmiter since I use a continuous 1/4" spline to do my case assembly and face frame attachment to the case. I find the lockmiter to be very quick, easy and mostly foolproof once it's understood. I would say I don't spend more than 3-4 minutes to change a head out to the lockmiter. As a result, it won't be quite as beneficial to others.
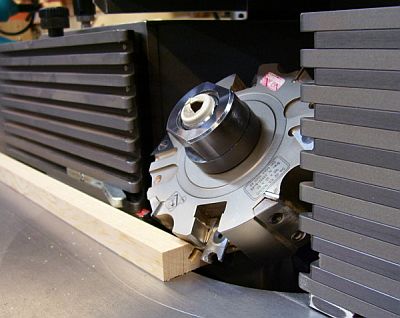
From contributor C:
The attached photo is a lean manufacturing lock miter setup - 5minutes or less to setup. The cutter is a Garniga rebate head with inserted slotting cutter and tilted to 45.05 degrees. Feeder removed for clarity. Different thickness is not a problem. The only drawback to this setup is the extra time to mill up the spline. That is the advantage of a normal shaper lock miter setup. I never liked running the vertical piece though. We run these after the frame is assembled - you didn�t say if yours was before or after? It seems like if you just need the miter the sliding table saw would be the easiest. My shop guys like that method because it is no setup other than tilting the blade. But then they have to biscuit and that takes a lot of clamping and time. And mitered biscuits in the field are a nightmare. If you�re mitering before assembly the slider is out. To answer your power question, I think 5 HP is enough.
From contributor C:
To the original questioner: I just read your post on dedicated machine justification. I hope you know I am just pulling your chain when I called that a �lean manufacturing lock miter setup� You are the small shop Meister of Lean. As we have discussed, you�re trying to focus on a product and reduce your costs while my shop caters to architectural woodwork where the challenge is to produce a project as quick as possible after the drawings and finish are approved. We have good systems in place but are still challenged with a lot of bespoken designs. And the biggest constraint is still the office (my job).
Your �fax machine tribe� term cracks me up and I can relate to that. I have had good luck with some of the new technology implemented in the shop and some of it not so good. The NC shaper is one tool that is not effective for the tribe. If we had the same setups every day it would, but where some profiles are just run every so often it is difficult for them to remember even with written instructions. I think a lot of the high tech machinery can be justified by the one man shop or a one man shop using helpers. Dedicated shapers are definitely tribe friendly machines but they take a lot of floor space. Have you looked at Unique Machines door shapers? A local cabinet door shop guy here swears by them.
For a while I have been thinking about a CNC router. For the profiles we run it will take an expensive heavy duty machine. I know they have been cost effective for large shops but for our mix of product I am not sure. I am taking Stiles European tech tour in a couple weeks. The tour this year is small to medium millwork shops using CNC routers. It should be a good learning experience.
From contributor D:
We do a lot of miter cuts on the shaper in the museum woodshop where I work, and have stopped using splines because of the time involved and trouble getting tight glue lines where we used them. Now, we set the parts to be joined face up on our assembly table with the mitered edges touching, and run blue tape down each miter, flip the taped parts over, apply glue, and fold up. This assures that the miters stay aligned while we apply clamps. We use the Lamello webbing straps and aluminum corner extrusions, and have had great luck and speed with this system. It is the best clamping system for mitered assemblies that we have found. We often join hardwood ply pedestals and furniture this way, which has been specified for a clear finish, and get beautiful, no-filler joints.
From the original questioner:
To contributor C: If I let my feelings get hurt every time you pulled my chain I would be in a fetal position right now. I was going to mention something about that Martin shaper in my rant about dedicated machinery. I would say that a shaper like yours is right up near the top of my short wish list, for a bunch of reasons. One of them is just the pure joy of working with fine equipment. The other one is excellence in manufacturing. I would say that the two areas which require the most skill in my shop are edge sanding and shaper set up. It's hard to teach somebody about landing a piece of wood on the edgesander like you would land an airplane on a lake. It's also tedious to get back to the last set up when you ran a specific piece of molding that you want to repeat.
Another good reason for the Martin stuff is that it makes it easier to recruit and retain good woodworkers. The good ones find self-validation in this trade. They want to work on interesting projects and appreciate good equipment. Let them work on Martin equipment and they're going to stick around longer. After all, how are they going to go back to the farm after they've seen TV?
From the original questioner:
To contributor D: We glue our miters together with a tape hinge just like you use. We did it with the blue tape for a long time then one of the new guys suggested clear packing tape. Peeling it off is a bit tedious but you can sure see what you're doing.
From contributor C:
Great tip about the tape! I�m going to try that. I never liked the splines or biscuits either. What about doing a face frame and one end panel? Use any clamps.
From contributor F:
Rockwell and now Delta (about $2000 new) have long sold a heavy duty shaper. Powermatic made an almost identical machine. Although these machines are by no means what I would consider a heavy shaper, they are nonetheless very robust and rugged and do well in an industrial environment. They have a very small footprint and can be had used for about $500-$600. They are easy to find, and they will easily handle a full size feeder in spite of their small size. They are typically 2-5hp and should handle your mitering operation without strain.
From contributor E:
Interesting thread, guys. Two things - both of which are more or less related to the process of mitering long grain to long grain. First, I worked for a time in a small cabinet shop that had used mitered returns between face frames and end panels for years on a shaper. The only thing outstanding difference was the cutters - they were custom ground to 45.25� and 22.25� to help ensure tight joints out at the corners where it matters. Second, while not well-suited to face frames, for other long-grain miter glue-ups, we used stretch wrap like you'd use to palletize items for shipment. The glue doesn't stick to it, and it doesn't stick to the wood. The best part is that once you have it stretched around the joint, it actually pulls the joint together as you work it with a soft mallet, etc. It's also clear like packing tape for visibility.