Touching Up the Burnt Ends of a Routed Flute
Here's advice on cleaning up the rounded end of a flute if the router leaves burn marks — and on scraper sharpening, and on how to avoid those burn marks to begin with. February 11, 2010
Question
Does anybody have a good way or a special tool to take out burn marks left at the ends of flutes after routing? It’s very awkward the way I do it.
Forum Responses
(Cabinet and Millwork Installation Forum)
From contributor D:
Black paint works great.
From contributor S:
I don't see any quick way of doing it besides not creating the burn in the first place. It sounds like you might be holding the bit in place a little too long or using a dull bit. There are lots of reasons. A dremel or multimaster might do the trick but will take a while.
From contributor P:
A scraper with the correct radius takes out 15 seconds per flute to dress up. It keeps all the edges crisp too.
From contributor F:
I agree with contributor P that a scraper is the best way to remove any type of tooling burns. If you can find a new or used triangular scraper with a handle, you can simply grind one of the three corners to a radius a little smaller than the radius of the flutes. Although it is small it can be prepared with the same steps as a typical card scraper. For best results, polish the face flat, file and hone the edge square, and roll a burr with a smooth burnishing tool. You always get advice that you shouldn't be getting and burns but in all my years I still manage to get a few.
From the original questioner:
Yes I have eliminated most burns by decreasing router speed at the very end of the cut (router speed control unit). Like you said sometimes it’s unavoidable. Can you describe the burnishing part of the tool grind a little more? I have some scrapers but never use them. The edge should be perpendicular to the face?
From contributor F:
I now know that the quality of the preparation makes a world of difference. For years I had scrapers that were pretty good. After I tried a few new tricks I now have scrapers that push or pull big piles of fluffy shavings with ease. The edges of card scrapers should be close to 90 degrees to the faces. More important is the fineness of the final honeings on both the face/faces and the edge/edges.
The thing I thought was really overkill was when I read that the burnishing tool (ticketer) should also be highly polished for best results. So, for kicks I tried polishing my burnisher on a felt wheel loaded with jeweler’s rouge. Sure enough doing that actually made a huge difference in the quality of the cutting burr.
From contributor F:
To the original questioner: I don’t think you can go wrong with English made tools. The English typically make quality products with excellent steel. If you have a WoodCrafters store in your area, it might be more fun to shop and be able to see the products first hand. When it comes to stones, it gets to be a matter of personal preference. A lot of makers like the water stones and swear by them. For myself, I keep things fairly simple and I have three Arkansas stones and a couple of "India" stones. My Arkansas stones are medium, fine and then the very fine "surgical black". Also very handy to have around is a set of "Arkansas Files". These are actually stones and not files. These small shaped stones come in handy for small tricky honeing such as profiles on molding knives or even a radiused small scraper. I generally use my three Arkansas stones for honeing the bevels on chisels and plane irons.
Be aware that "special" honeing oils are not really necessary. A lot of us use just a few drops of kerosene in conjunction with India or Arkansas stones. For any flat surface like the backs of chisels and plane irons and also the faces of card scrapers, I prefer to use silicon carbide sandpaper on thick glass. Unlike the surface of a used honeing stone the surface of plate glass is always perfectly flat. You can actually do the whole sharpening job on chisels and plane irons on silicon carbide paper stuck to glass with unbelievably sharp results. The local glass shop will have scraps of thick glass usually for no charge. 1/2" thick is great and 3/8" thick minimum. I like to use 3M spray 77 adhesive to stick the paper to the glass. I spray only the back of the silicon carbide paper. The grits I use depend on the job at hand. If I am trying to restore an old plane iron with a rust pitted back, I might start with 60 grit. To prepare a card scraper, for the first time I start with 220 and go up to at least 600. (220,320,400,600).
When refreshing one I already have in use - probably just 320 and up. They sell silicon carbide in some very fine grits above 600. Using them will make whatever you sharpen sharper but out of laziness/ need for production I generally stop at 600. Once you initially flatten the back of any chisel, plane iron, spokeshave iron, card scraper face, and ect., you only need to re-polish it. This is usually when the bevel needs to be reground or in the case of a card scraper, when the edges need to be refreshed.
For the edges of the card scraper I take two flat pieces of hardwood roughly about the same length and width of the scrapers face. I sandwich the scraper between them with about 1/64" of the scrapers edge poking evenly above the top of the two boards and clamp the whole thing in a bench vise. I file the edge of the scraper with a fine mill file. The square and straight edges of the two boards make it easy to file the scrapers edge straight and at 90 degrees. After filing I leave it clamped, sprinkle on a few drops of kerosene, and then rub the edge with a fine grit flat faced Arkansas file or other small sharpening stone.
This can of course be done by hand holding the scraper on either a large stone or sandpaper and glass it just takes more skill to keep from rounding the 1/16" wide edge of the scraper. If you cannot find a small triangular "corner scraper" with a handle that you can modify by grinding one of its corners to your flute radius, you can grind one corner of a card scraper to do the job.
From contributor T:
Have you tried using the router bit itself as the scraper?
From contributor A:
The best tool for sharpening is a book. The Complete Guide to Sharpening by Leonard Lee is a good one. The first time you sharpen a scraper so it's really humming is one of those "light bulb" moments in your woodworking education.
From contributor T:
When the design allows it, I like to use a small tapered wedge (1/2" over 3") to lift/lower the router bit into the wood to prevent burning. The burn marks come from stopping the motion of the router while the bit is still cutting. With my method the router bit completely exits the wood while still spinning, creating a slightly pointed flute but leaving no burn.
Click here for higher quality, full size image
From contributor Z:
Another approach we have used is to do this in a two step process. The router table (or sled) has a plastic laminate shim added to it. The first pass is made with the shim in place and the second pass is made with the shim removed. Make the first pass at almost full depth then change the shim. Moisten the end of the flute with a wet rag right before the last pass. You will get some raised grain from this it will be a lot easier to sand out than a burn mark.
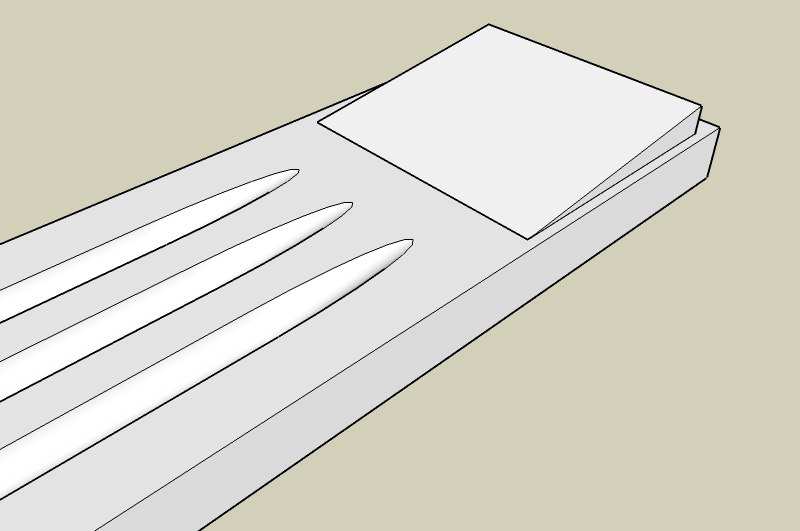
From contributor K:
I've done several tapered flutes like the image above with an LRH table saw fluting blade. Clean, no burning.
Click here for higher quality, full size image
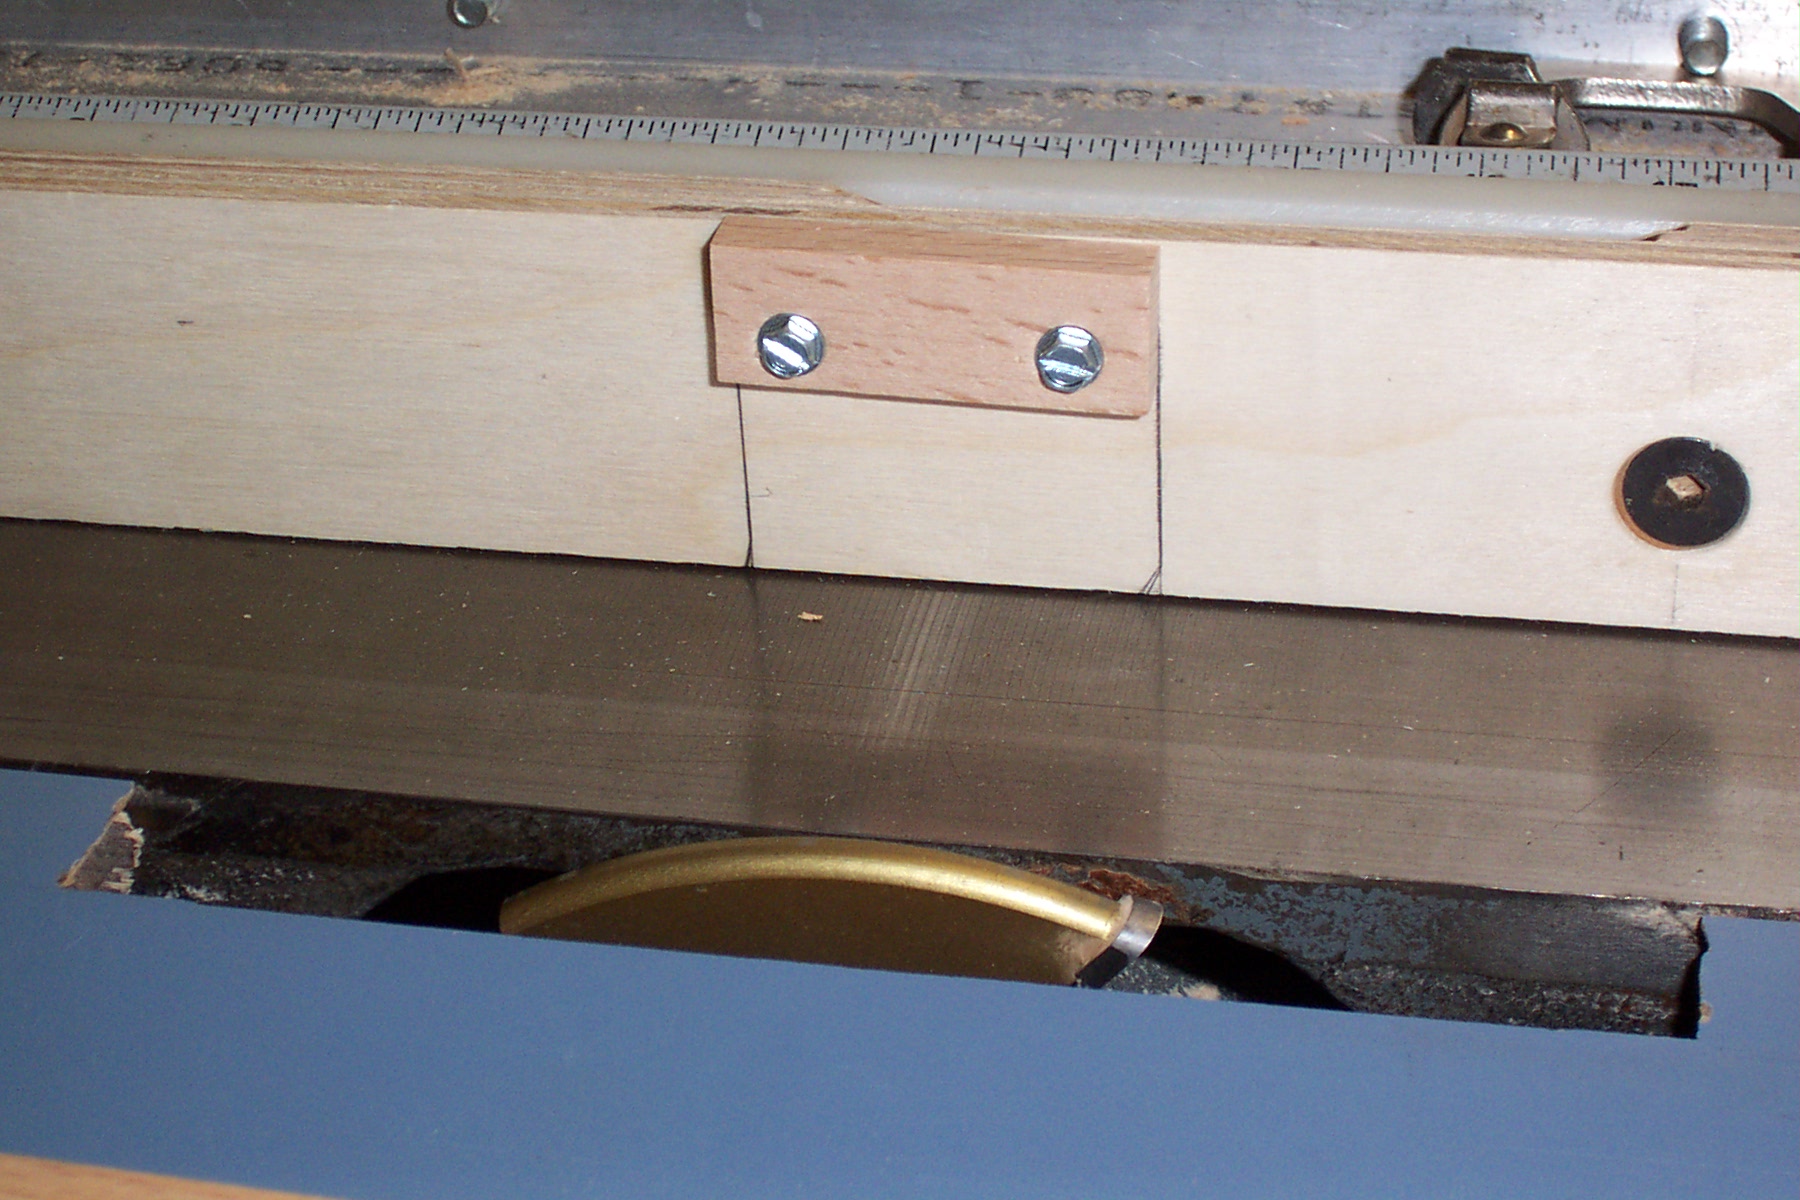
From contributor K:
I knew someone was going to ask about that. I had a job that had flutes that stopped then started along the length of the stile so I attached blocks to the back of the stock to act as starting and stopping points. You have to take your time to slide the stock against the fence before you drop down on the blade but by using the blocks the start and stop point are right on.

Click here for higher quality, full size image