Question
I'm about to make my first attempt at laying up radius doors (slab, no details) and from everything I see it is more common for a mold to be thickest at the center and then the layers sucked down around the outside of the form.
The doors I'm making are for a cabinet with a convex front, so the doors bulge away from the face of the cabinet. I was thinking it would be easier to make the mold so that the face of the door would be against the mold so it matches the profile I need and it doesn't matter the final thickness of the curved panel, versus making the form for the inside of the door and calculating the buildup of layers and glue.
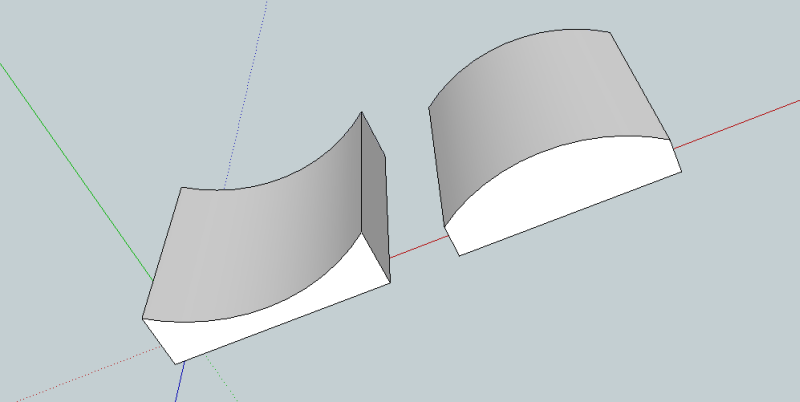
The form I�m proposing is more like the one on the left in the picture, minus the sharp corners at the edge (it's actually a radius transition back to flat). I'm just curious if I'm asking for trouble trying to suck the material down to the center of the form like that. I have a 4x8 bag, so I have plenty of room to work with.
Any advice would be appreciated, I'm sure I'll learn plenty from this first attempt, I'm just trying to save myself from complete failure and wasting the material or damaging the back.
Forum Responses
(Cabinetmaking Forum)
From contributor T:
You don't need the concave form just use the convex form and put it in the bag.
1. It registers the shape of the face of the door, not the back which is insignificant in this case.
2. I can reuse the form using different materials if what I try first does't work, the form isn't built around a specific finished thickness of panel being created.
3. It would allow me to split the pairs of doors by using the form as a sled when I get to that point.
The wood I'm using is actually 2.6mm birch plywood - it's the thinnest sheet material I could find locally besides paper thin veneer. I figured if the 3-ply sheet doesn't bend well enough or has too much springback I can take pieces to a neighboring shop and have them widebelt the veneer off leaving me the core at around 2mm. The wood as is seems flexible enough to make the shape without much pressure so I'm hoping it works without the sanding. I plan on making the form solid particle board and covering it with some scrap laminate. That seems the simplest way for me and no chance of collapse or change in shape.
For that reason and economy I generally make such forms with a baseplate of plywood or MDF stapled to ribs covered with wackywood and laminate. If the form is taller than 3" or 4" I add cross-blocking between the ribs. The height of the form at the ends need be only enough to provide fastening for the base and ribs, the lower the better if you want to use it as a sled. You can use the convex form as a sled just as well as a concave form. If built accurately, the form can serve as a template for a piloted router bit.
The 3ply you have should be fine for anything but a radical curve, in which case you could get some 2ply or sand off one face of what you have. It's a good idea to do a sample to assess springback, and it's safest though not mandatory to glue up the cores first and then the face veneer in a separate operation. That will allow you, if desired, to edgeband the panel prior to face veneering, as well as check and correct for fairness in the core glue-up. I don't think Contributor M is proposing a two piece form, just trying to decide whether to use a concave or convex form in a vacuum press.
The form will take a little over one sheet of particle board to make the solid form. I plan on cutting a bunch of ribs on the CNC with a 1/2 hole in each side and using long dowels to align them. I have a 4x8 bag to make the next step easier. I have it set up with 1/4 melamine in the bag already so things just slide in and out, and some strips of thin plywood are in there holding it open like a tent. I think you guys have convinced me to make the convex form, I'm anxious to see how this turns out.