Veneering a Grooved MDF Panel
A craftsman struggles to find a way to apply veneer to a heavily profiled sheet of MDF with deep, regular grooves. January 25, 2013
Question
I have been asked to do a job that some people are saying cannot be done, and I�m looking for help from the experts out here. The job I have is to glue 1.5 or 1.7mm ebony veneer to MDF sheets that have a concave groove in it. These will be very large wall panels. I am using a vacuum press. This is a new area for me so I am just learning this process. I have done some tests using red oak and walnut veneers. Both types of these veneers have failed. The veneer is splitting before it forms into the lower section of the concave.
I have read about using a softening agent to help the veneer form into the concave. Has anyone else done this type of veneering? I would appreciate any help offered. Below is an image of the MDF panel with concave pattern. This is just a small sample. I will be gluing much larger panels if I can solve the splitting problem
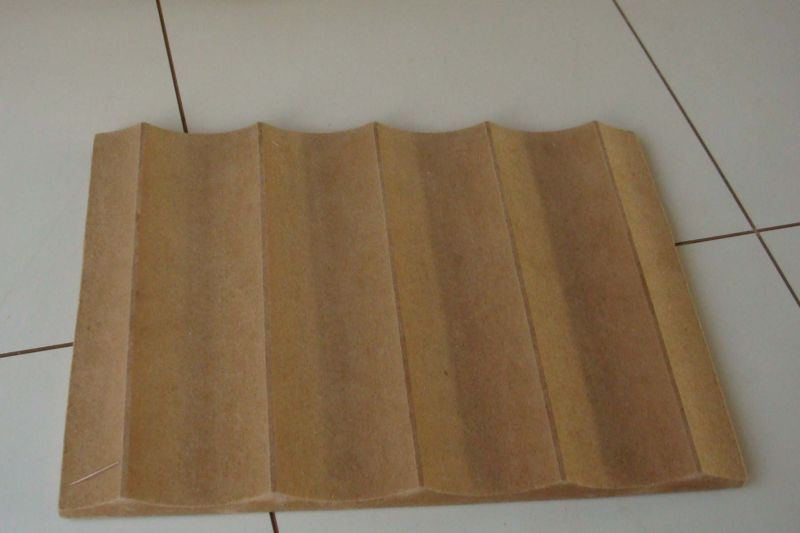
Click here for higher quality, full size image
Forum Responses
(Veneer Forum)
From the original questioner:
Here is a pic of the veneer when it is in the vacuum press. Splitting is very bad! Is this possible to solve?
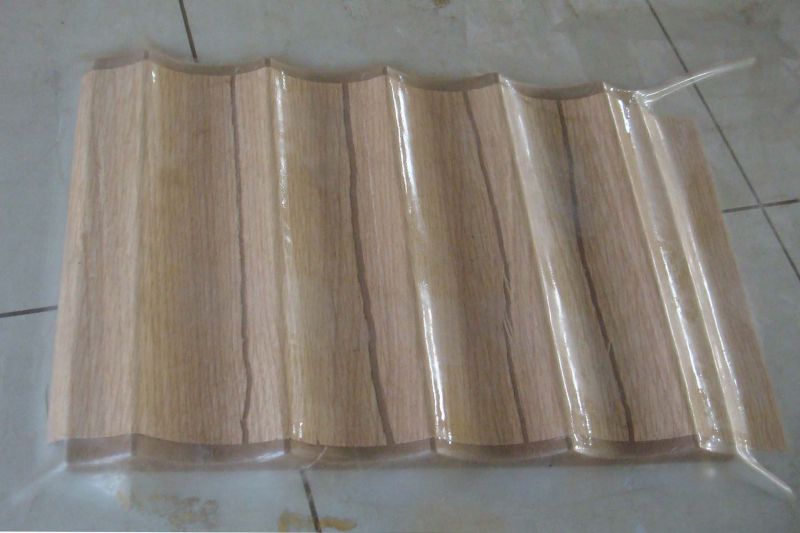
Click here for higher quality, full size image
From contributor E:
It looks to me like the veneer is splitting because it is trying to stretch down into the valleys, but the peaks are holding the veneer. It needs to slide down into the valleys from left to right, or vice-versa. One thing you could try is using a stapler, or tape to lay the veneer into the grooves (starting from one side or the other) before applying the vacuum. You may need to use a reverse caul in the valleys with a screw on each end to pull the veneer down before using the vacuum. I am sure that if you try a few things you will figure out how to get this to pull down properly.
From contributor R:
Try a two ply face with the xband running at a 90 degree angle. It should keep the veneer from splitting but you may have a rounder peak.
From contributor M:
Ripping the panels at the peak or every other peak would make the veneering part easier.
From the original questioner:
Thanks for the advice. I have been testing different methods but none have worked completely but we are getting closer. Contributor E suggested a reverse caul. I do like this method but I think it is very difficult to make a reverse caul of this shape. I will need to veneer 4� x 8� sheets. I have not tried the two ply method that Contributor R suggested. I do believe that the veneer will not form securely in the top peaks of the board. It just seems too hard for the veneer to bend that tight.
Contributor M suggests to rip the panel at the peaks. The problem I see with this is that I will lose 1/8� per rip. When I try to install the 8� lengths on the wall I believe I will have trouble getting good joints between each rip. Also, the panels will be prefinished so all these individual rips may be a problem to hold securely on the wall.
From contributor P:
Not sure how big your panels will be, but you could try acquiring a footswitch for your vacuum pump. After the piece is placed in the bag, work outward from the middle and press the veneer down into the valleys. Use the footswitch to control the tempo of the pump as you work the veneer into place.
From contributor D:
What about cutting the veneer into rips corresponding to the peaks and valleys and then taping back together? This would allow the veneer to sink down into the valleys. If you tape the seams properly and they are cut cleanly you may not even see them. Or you can just cut at the valley bottoms and tape together so it acts as a hinge and relief-cut the peaks on the back side just enough to take the tension off the veneer without cutting through.
From contributor A:
The veneer is going to be way too thick. You need .6mm at the thickest. The 4'x8' size of panel is the next biggest problem. I don't think you can be successful trying to lay this up in full sheets. I would use veneer softener liberally then place in the press without glue. Before the vacuum gets very high stop the pump and manually push the veneer down into the valleys, slowly bringing up the vacuum. If you can do this without any issues then the veneer will dry and fit your form.
The issue in the bag is the bag will want to grab the peaks and not apply the same pressure down in the valleys unless you're very careful to make sure the bag doesn't have to stretch to reach the bottom of the valleys. It's difficult to explain, but the friction of the bag against the veneer is what prevents it from getting into the valleys efficiently.
The only way I would consider doing this is cutting the coves apart. Veneer each one separate and glue up into a panel with 1/8" solid between the coves. Maybe you could use the thicker veneer then.
From contributor W:
Why not soften the veneer real nicely and place in a bag on v-panels. Then take one of the other panels and use it for reverse cal. You may need to put a flat caul on top, it�s something you would need to work with. When the veneer dries you should be able to glue and repress.
From contributor J:
I like Contributor E's idea of a reverse caul. I also agree that the veneer is stretching and pulling apart and not necessarily splitting from the bends. How about hide glue and a hot iron pipe (the same diameter as your flutes)?
Start in the middle or on one end and screw or mechanically press the hot pipe down. The veneer should be pressed down firmly into one groove at a time. The hide glue is activated and set by the heat of the pipe. This kind of a method should allow the veneer to roll down into each flute instead of stretching itself apart. I can even imagine a rotary press machine specifically built to roll and press veneers to a regular wave surface. Try switching off the vacuum bag because it may be the problem here.
From contributor N:
First, I have no veneer experience but I think I might have an answer. Cut some long dowels or get some pipe that can be used to press into the low spots. Dampen the veneer or do whatever you can do to soften it and lay it out over the substrate. Form the veneer using the dowels or pipe by clamping the ends, moving from center out or from one side to the other till you have the veneer pressed into the shape of the substrate and let the veneer sit to take the shape; after it sits for however long maybe it will retain enough of the wave shape to avoid the stretching and tearing in the vacuum bag. Or if you have enough time you can do it with it glued in the bag and use the dowels on the outside of the bag. It seems to be you have to make it take the shape better before you apply the force of the vacuum.
From contributor D:
Just a spin on the last post - what if you cut triangles from solid material and use them to slowly push the veneer down into the valleys as you pulse the vacuum to slowly allow the pressure to build up? You would probably have to moisten the veneer or use a softener but if you did it slow enough it may work. It is kind of a spinoff on the reverse caul idea presented earlier as well as the last post.
From the original questioner:
Thanks for all the help! This has been a real difficult problem to solve. We have tried a few things but nothing works 100%. We are now looking at having the panels made of solid wood rather than trying to veneer. This method will cost more but the problems will be easier to deal with.
From contributor C:
Of all the previous posts the reverse caul is the best. There would have to be one for each valley and it would have to allow pressure at the peaks as well. My only other thought is that the bag is not sliding on the veneer and ripping it. This is common and the solution is to use paper between the veneer and the bag. Also, the foot switch idea is king because you can get a little vacuum going and then j-roll the veneer down the valleys as you bring the vacuum up.
From contributor T:
We would use fleece backed, double crushed veneer to start with. It allows us to do things that veneer cannot traditionally do. Then we would work out a method of gluing much like explained above. No sharp edges, etc. Work it out, experiment, and keep the faith.
From contributor U:
Just a word of caution - making solid panels will eliminate one problem, but could set you up for a much bigger one. Hogging out all the material will unbalance the MC of the solid. That creates lots of potential for warping and cracking, and the odds of your panels staying straight are not good.