Question
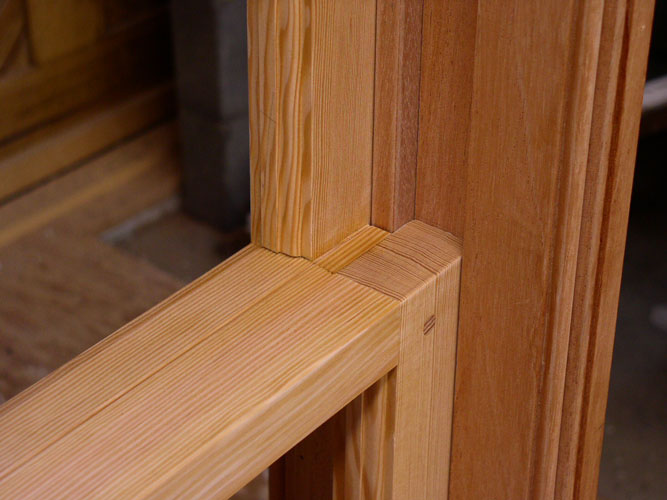
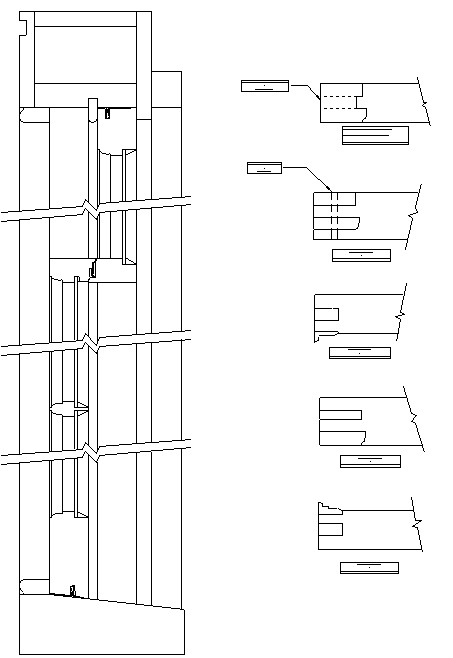
I have just finished making and delivering a sash window and jamb. After doing this and figuring out the peculiarities of cutting the meeting rails, I'm wondering how you do it. I milled the meeting rails as part of the main rails, but forgot to cut the rails long to extend to the stop beading. So I added a small section on each side glued with West System epoxy (painted). Do you cut the meeting rail lap profile out of separate material and then glue them to the top and bottom sashes? Or do you mill a double through tenon on the rails to match the mortise and half mortise on the stiles? I did not want to do a through tenon, but afterwards thought maybe it is required?
In this particular instance, the upper sash was stationary (matching existing in old house). Because of this the parting beads would not go in full length after installing the upper sash because of the meeting rail profile bevel. So I ended up making the parting bead in two sections and sliding each in separately, the top section first. Am I missing something here?
It would seem that in a window where the top sash did slide down, then the parting bead could be installed full length, but now I am unsure.
Forum Responses
(Architectural Woodworking Forum)
From contributor H:
Take a look at some old sash. The meeting rails should be thicker than the rest of the sash. Usually you can add on 1/16" less than the thickness of the parting strip. Check railed sash are normally made with through slot mortises. The older ones were dovetailed. If the top sash is fixed, put a stop under it that covers the parting strip plough. The parting strip needs to stop at the bottom of the top sash, and be beveled on the end to allow it to tilt out.
Comment from contributor L:
I restore and replicate historic sash. With every sash I have replicated the meeting rail runs full width and the rails get mortised into the meeting rail. Then the bevel on the meeting rail gets notched to accept the parting bead.