Wine Cubes
Experienced hands describe ways to design and assemble wine storage cabinets. June 13, 2005
Question
I have a client who wants a 4' x 4' cabinet filed with wine cubes. I was shown a picture, and they appear to be 1 x 12's attached together to form a lattice shape. The attachment of these pieces, and the beveled cuts where the pieces meet the cabinet, present a challenge. Does anyone have any thoughts?
Forum Responses
(Cabinetmaking Forum)
From contributor L:
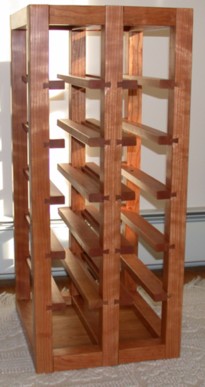
Did the client say if the profile had to be diamond/lattice shape? If so, I have no other suggestion than to figure the angles using geometry or trig. If the client wants open cubes, my suggesting would be to try something like the rack below. I made it for a client who wanted something small and unobtrusive for the dining room that would hold 12 bottles for immediate access to the table.
It could be easily adapted to fill a 4' x 4' box. Other than the fact I used sliding dovetails in the construction, the basic design is very common to the wine industry. The other advantage of this was the cube size holds magnums as well as standard 750 ml. bottles. If you go with a lattice design, I believe you'll use up more space to accommodate a magnum than if you use a square.
From the original questioner:
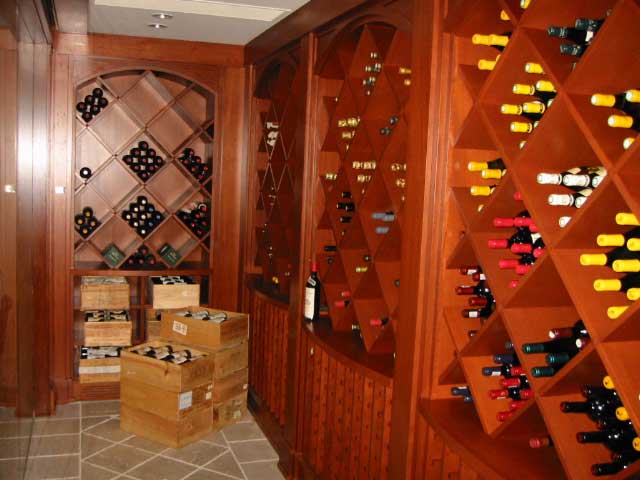
Here is a picture of what my client wants.

Click here for full size image
From contributor F:
To the original questioner: from what I see in the photo, you can make the interior joints as half laps joints (sometimes called egg crate joints). The miters on the exterior of the half lap assembly are simply 45 degree angles.
From contributor M:
I just finished a similar cabinet. I made each of the cubicles as a separate square box. I turned them on edge to look like the diamond shape and attached them in a row and a stacked row on top.
The key was to cut a flat spot on each edge running front to back so there was a nice secure fastening point, and also so the hardwood edging I put on the front would line up with each box. When I assembled this inside the carcass it was very attractive and sturdy. I've tried other ways, but this has been the quickest. I used a pre-finished cherry ply for the boxes so there were no nasty spraying challenges inside the cubicles.
From contributor B:
If you want a real simple assembly method, I would recommend you run all of your one direction horizontals, then cut the spacers for the other direction. Then, you could start by installing the longest diagonal, and use the spacer blocks to set the others. This way you can work it out so it fills up the opening. If the math is done right it will be centered and equal. After the layout is complete, use biscuits in the center of each layout line on the long legs - one in front and back. Install these pieces with the blocks one stage at a time. For the last stage just run a long biscuit groove that stops short of the front, and slide it on in there to lock it up. If it works out well enough, you won�t even have to glue anything.
From contributor W:
You should most likely do half laps if the section you are doing is square. Take the diagonal measurement for the inside of the square and divide by the number of sections along that line. Cut each side piece as a separate piece with a double miter at each end (to a point). Each piece on a square unit will be exactly the same size. Simply stack them inside the square box with a little glue and brads. Cut some test pieces for fit before you make a pile of firewood. Once you get them put in you can apply solid wood strips to the face to dress it up a bit.
From contributor C:
We built 6 nearly identical cabinets to house 1,300 bottles and we were less concerned about how to build these then we were about how to finish them. We assembled the guts (the diamonds) dry, disassembled everything and finished all the parts flat (with joints masked off) and re-assembled the pieces. We used a biscuit joiner to cut biscuit slots into the long diagonal members and kerfed the 12" spacers within 1/2" from the edge.
Click here for full size image