Message Thread:
New to finish dept
4/22/25

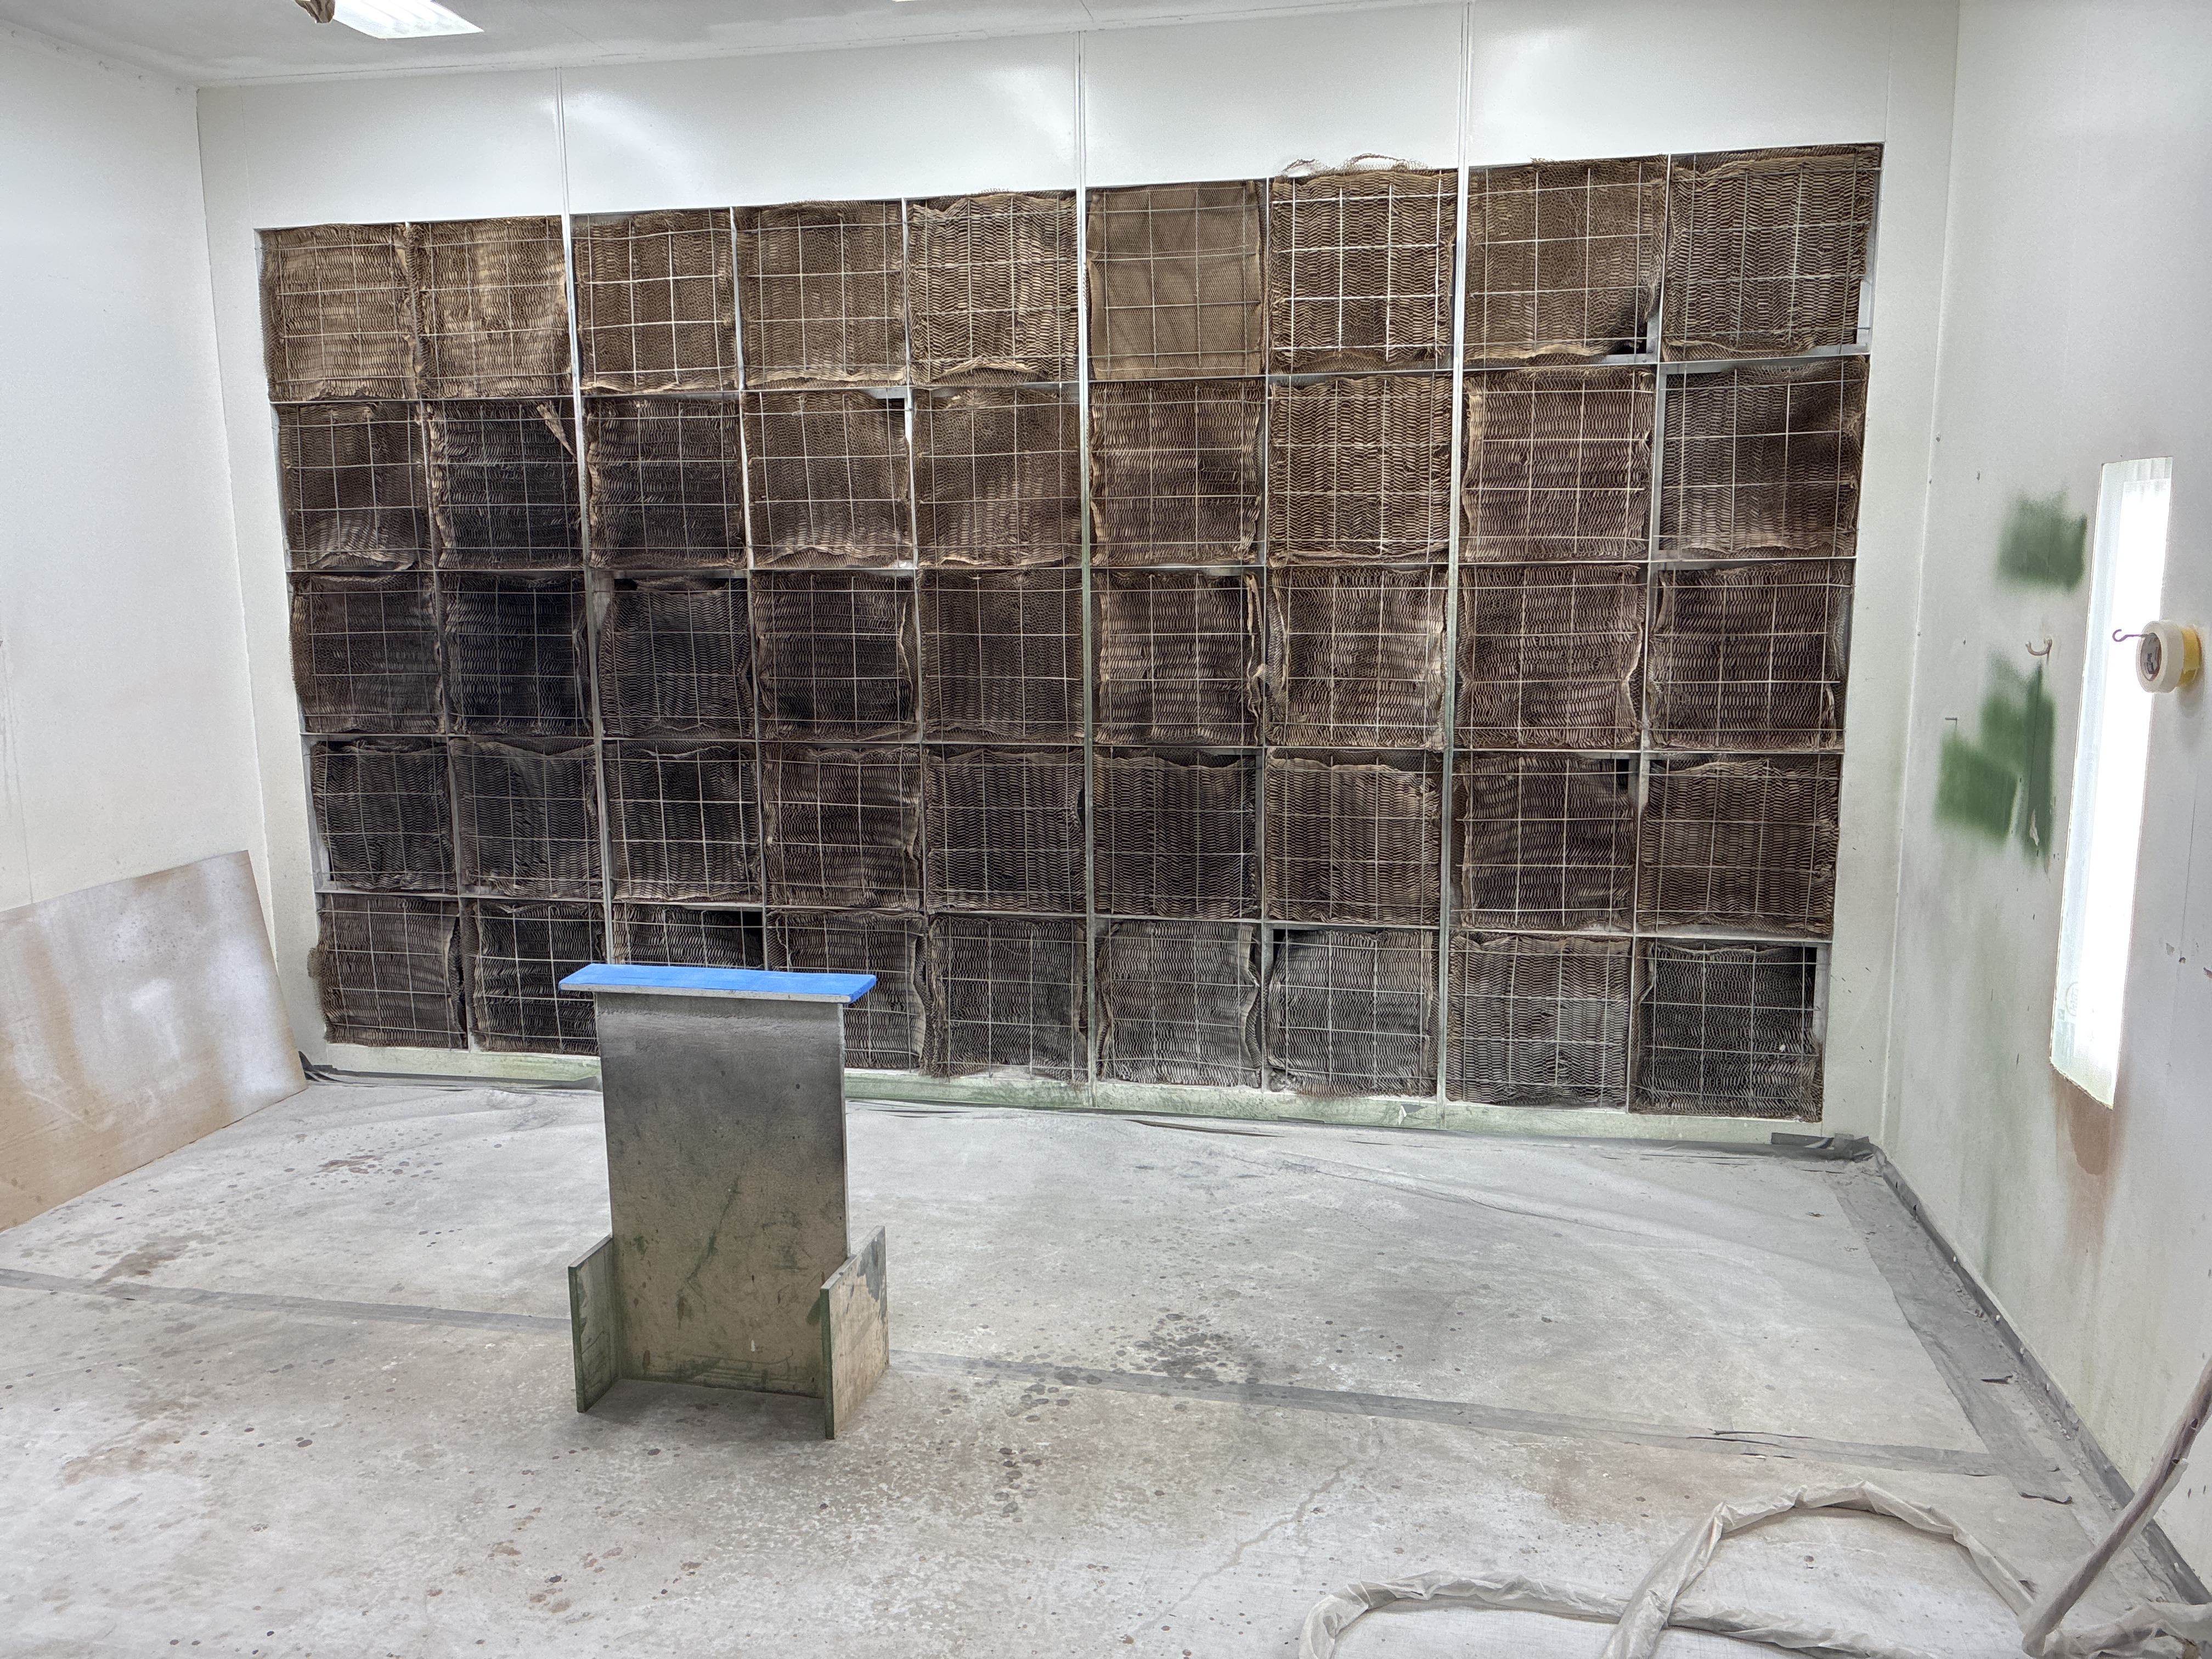
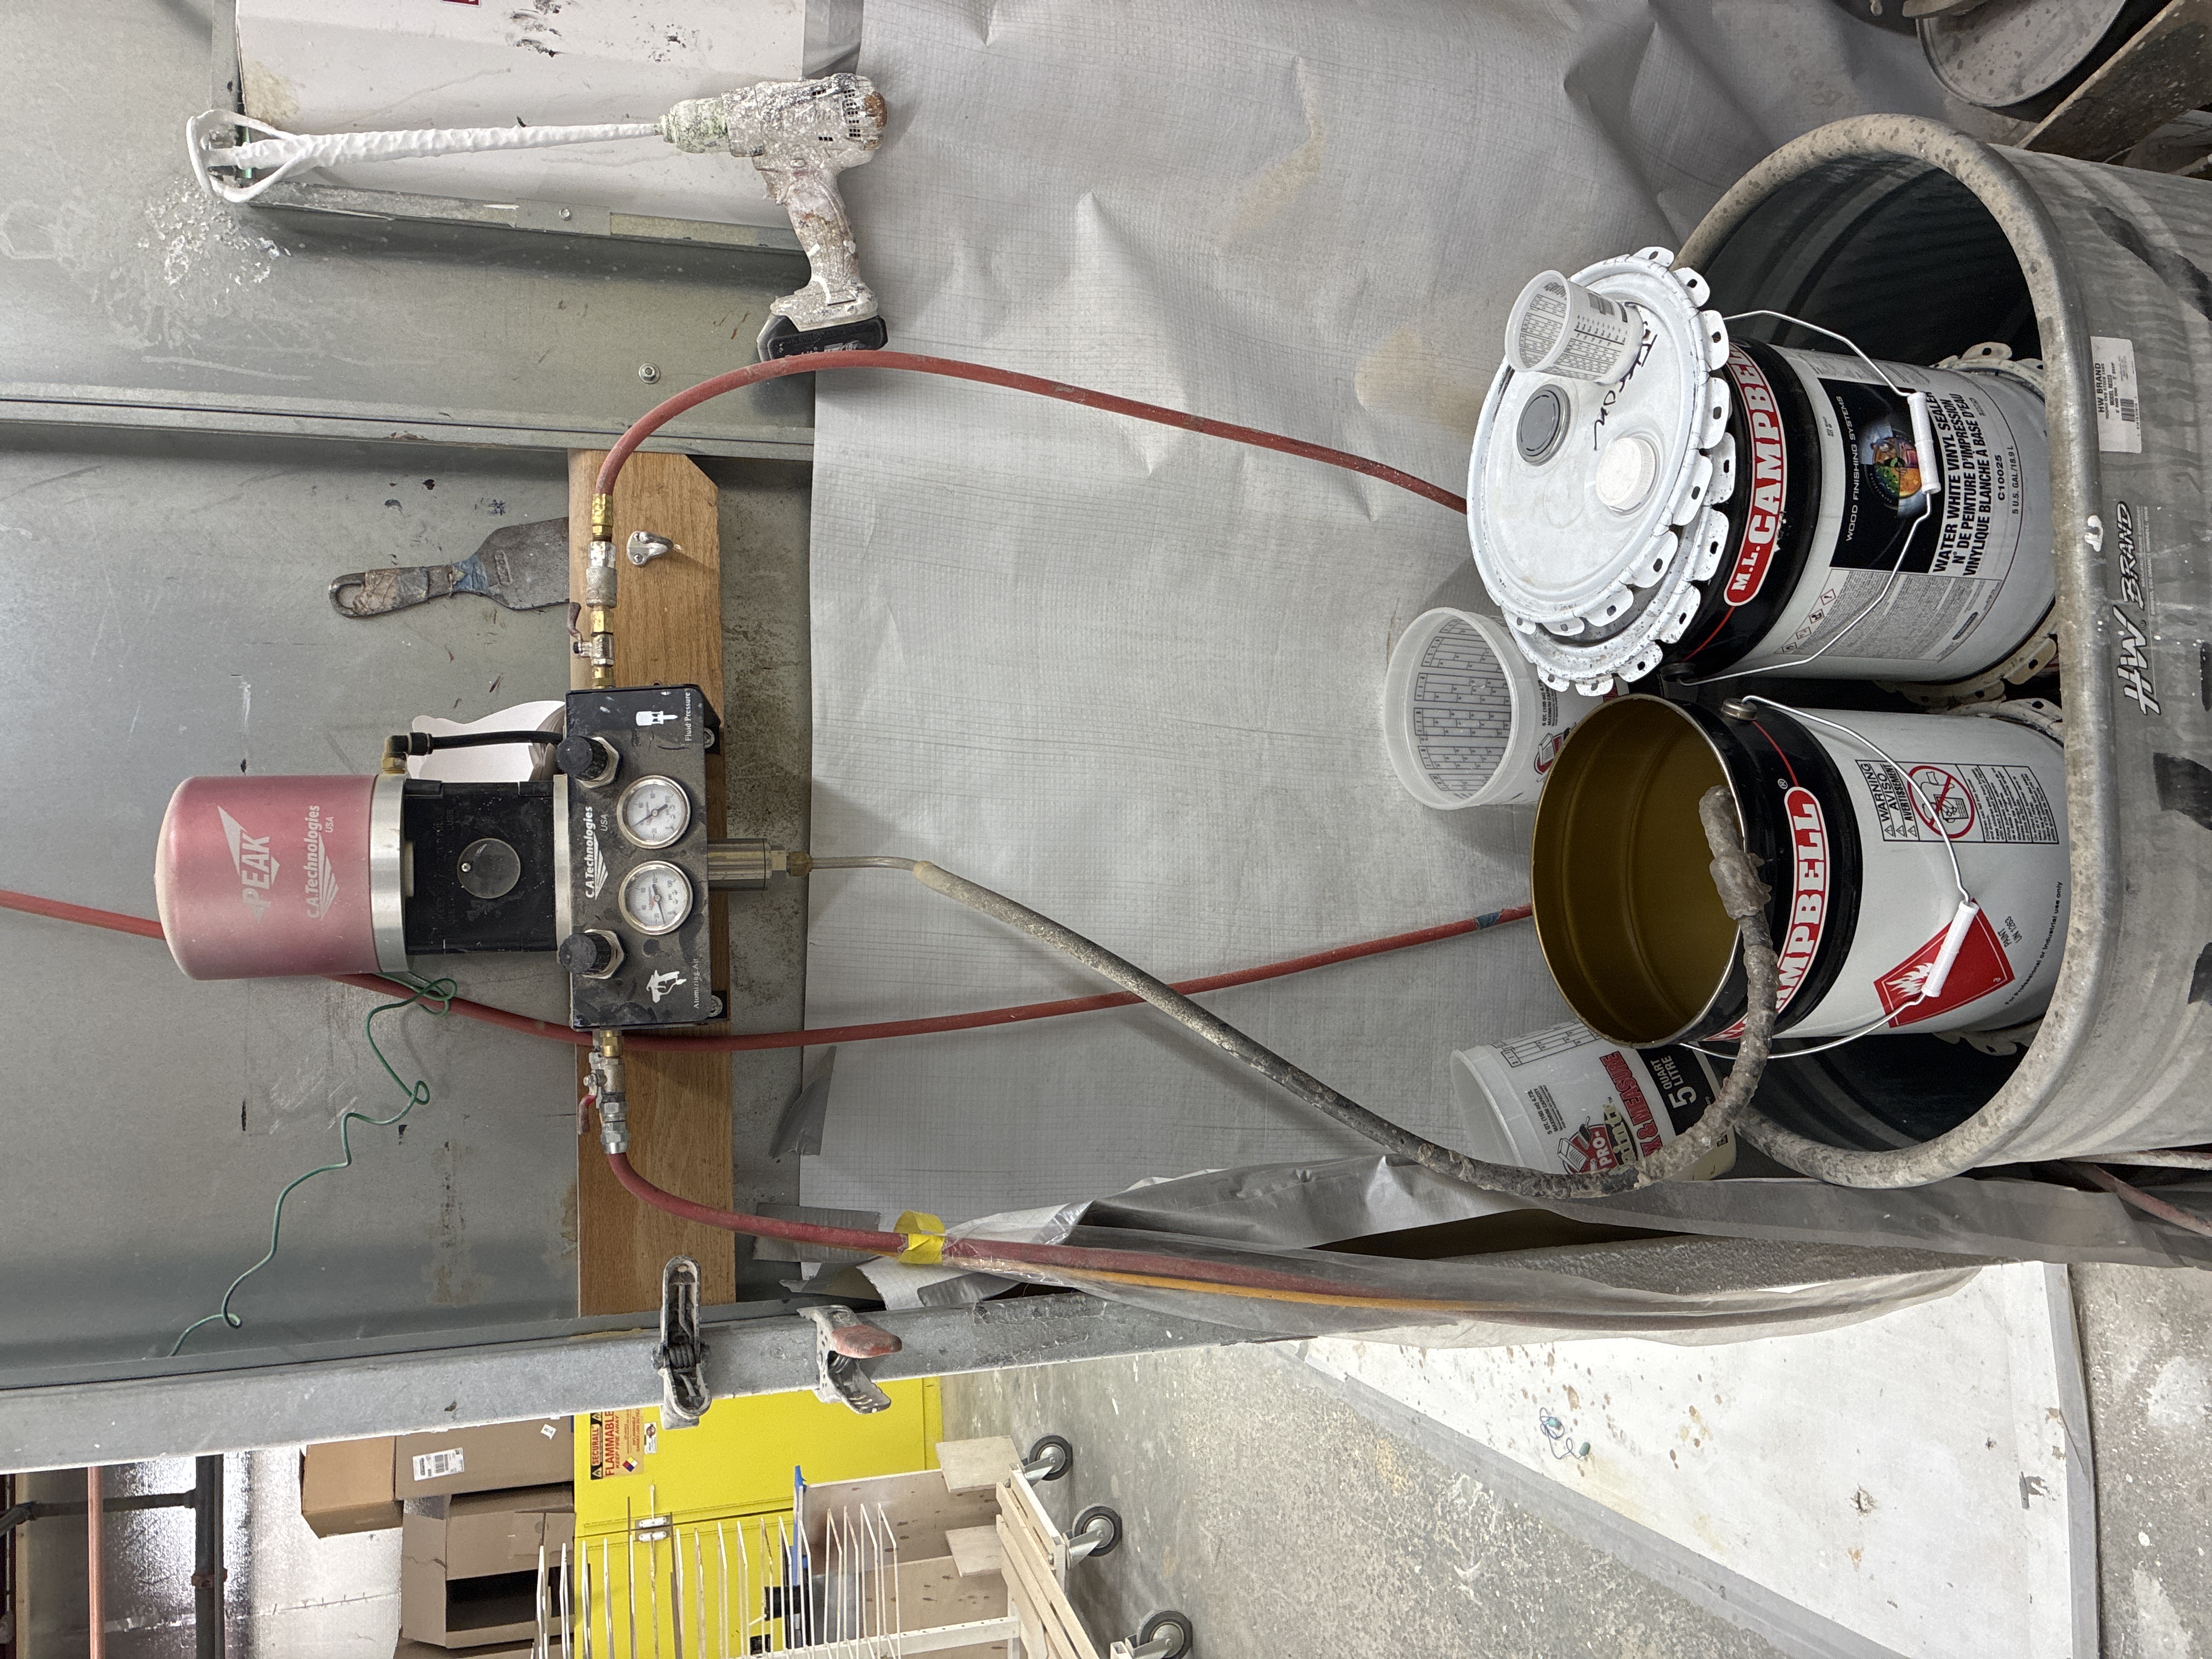
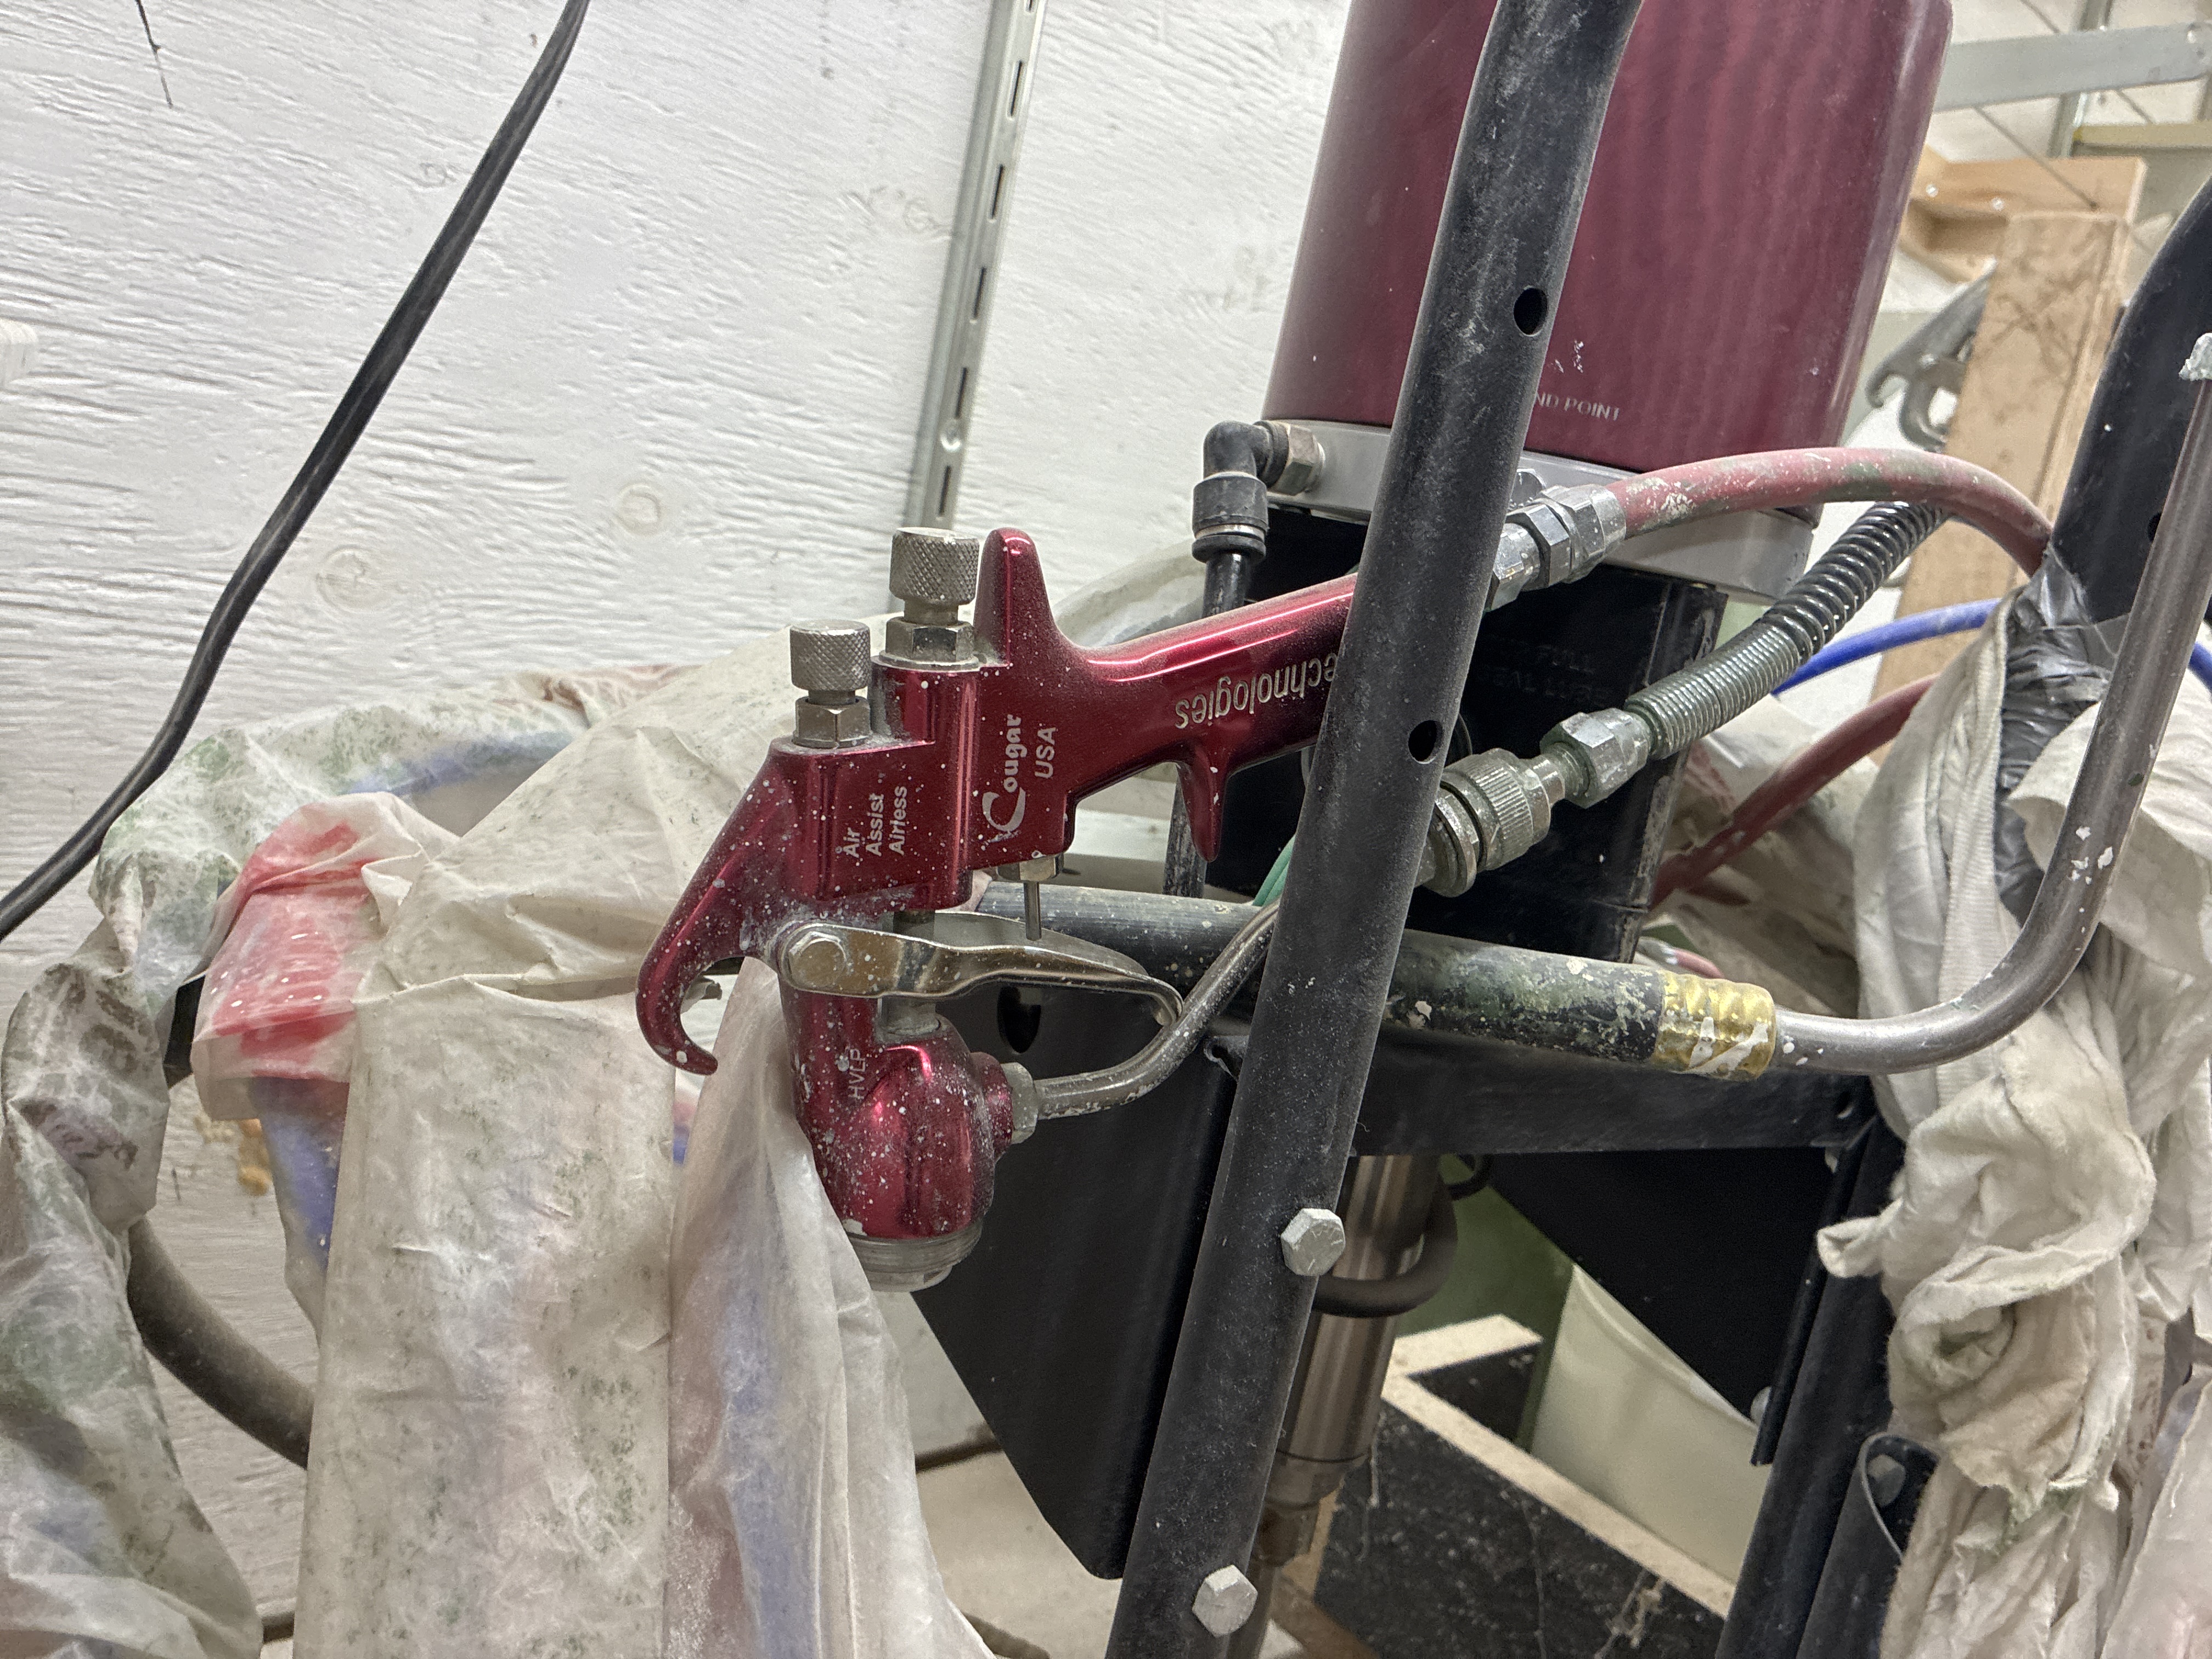
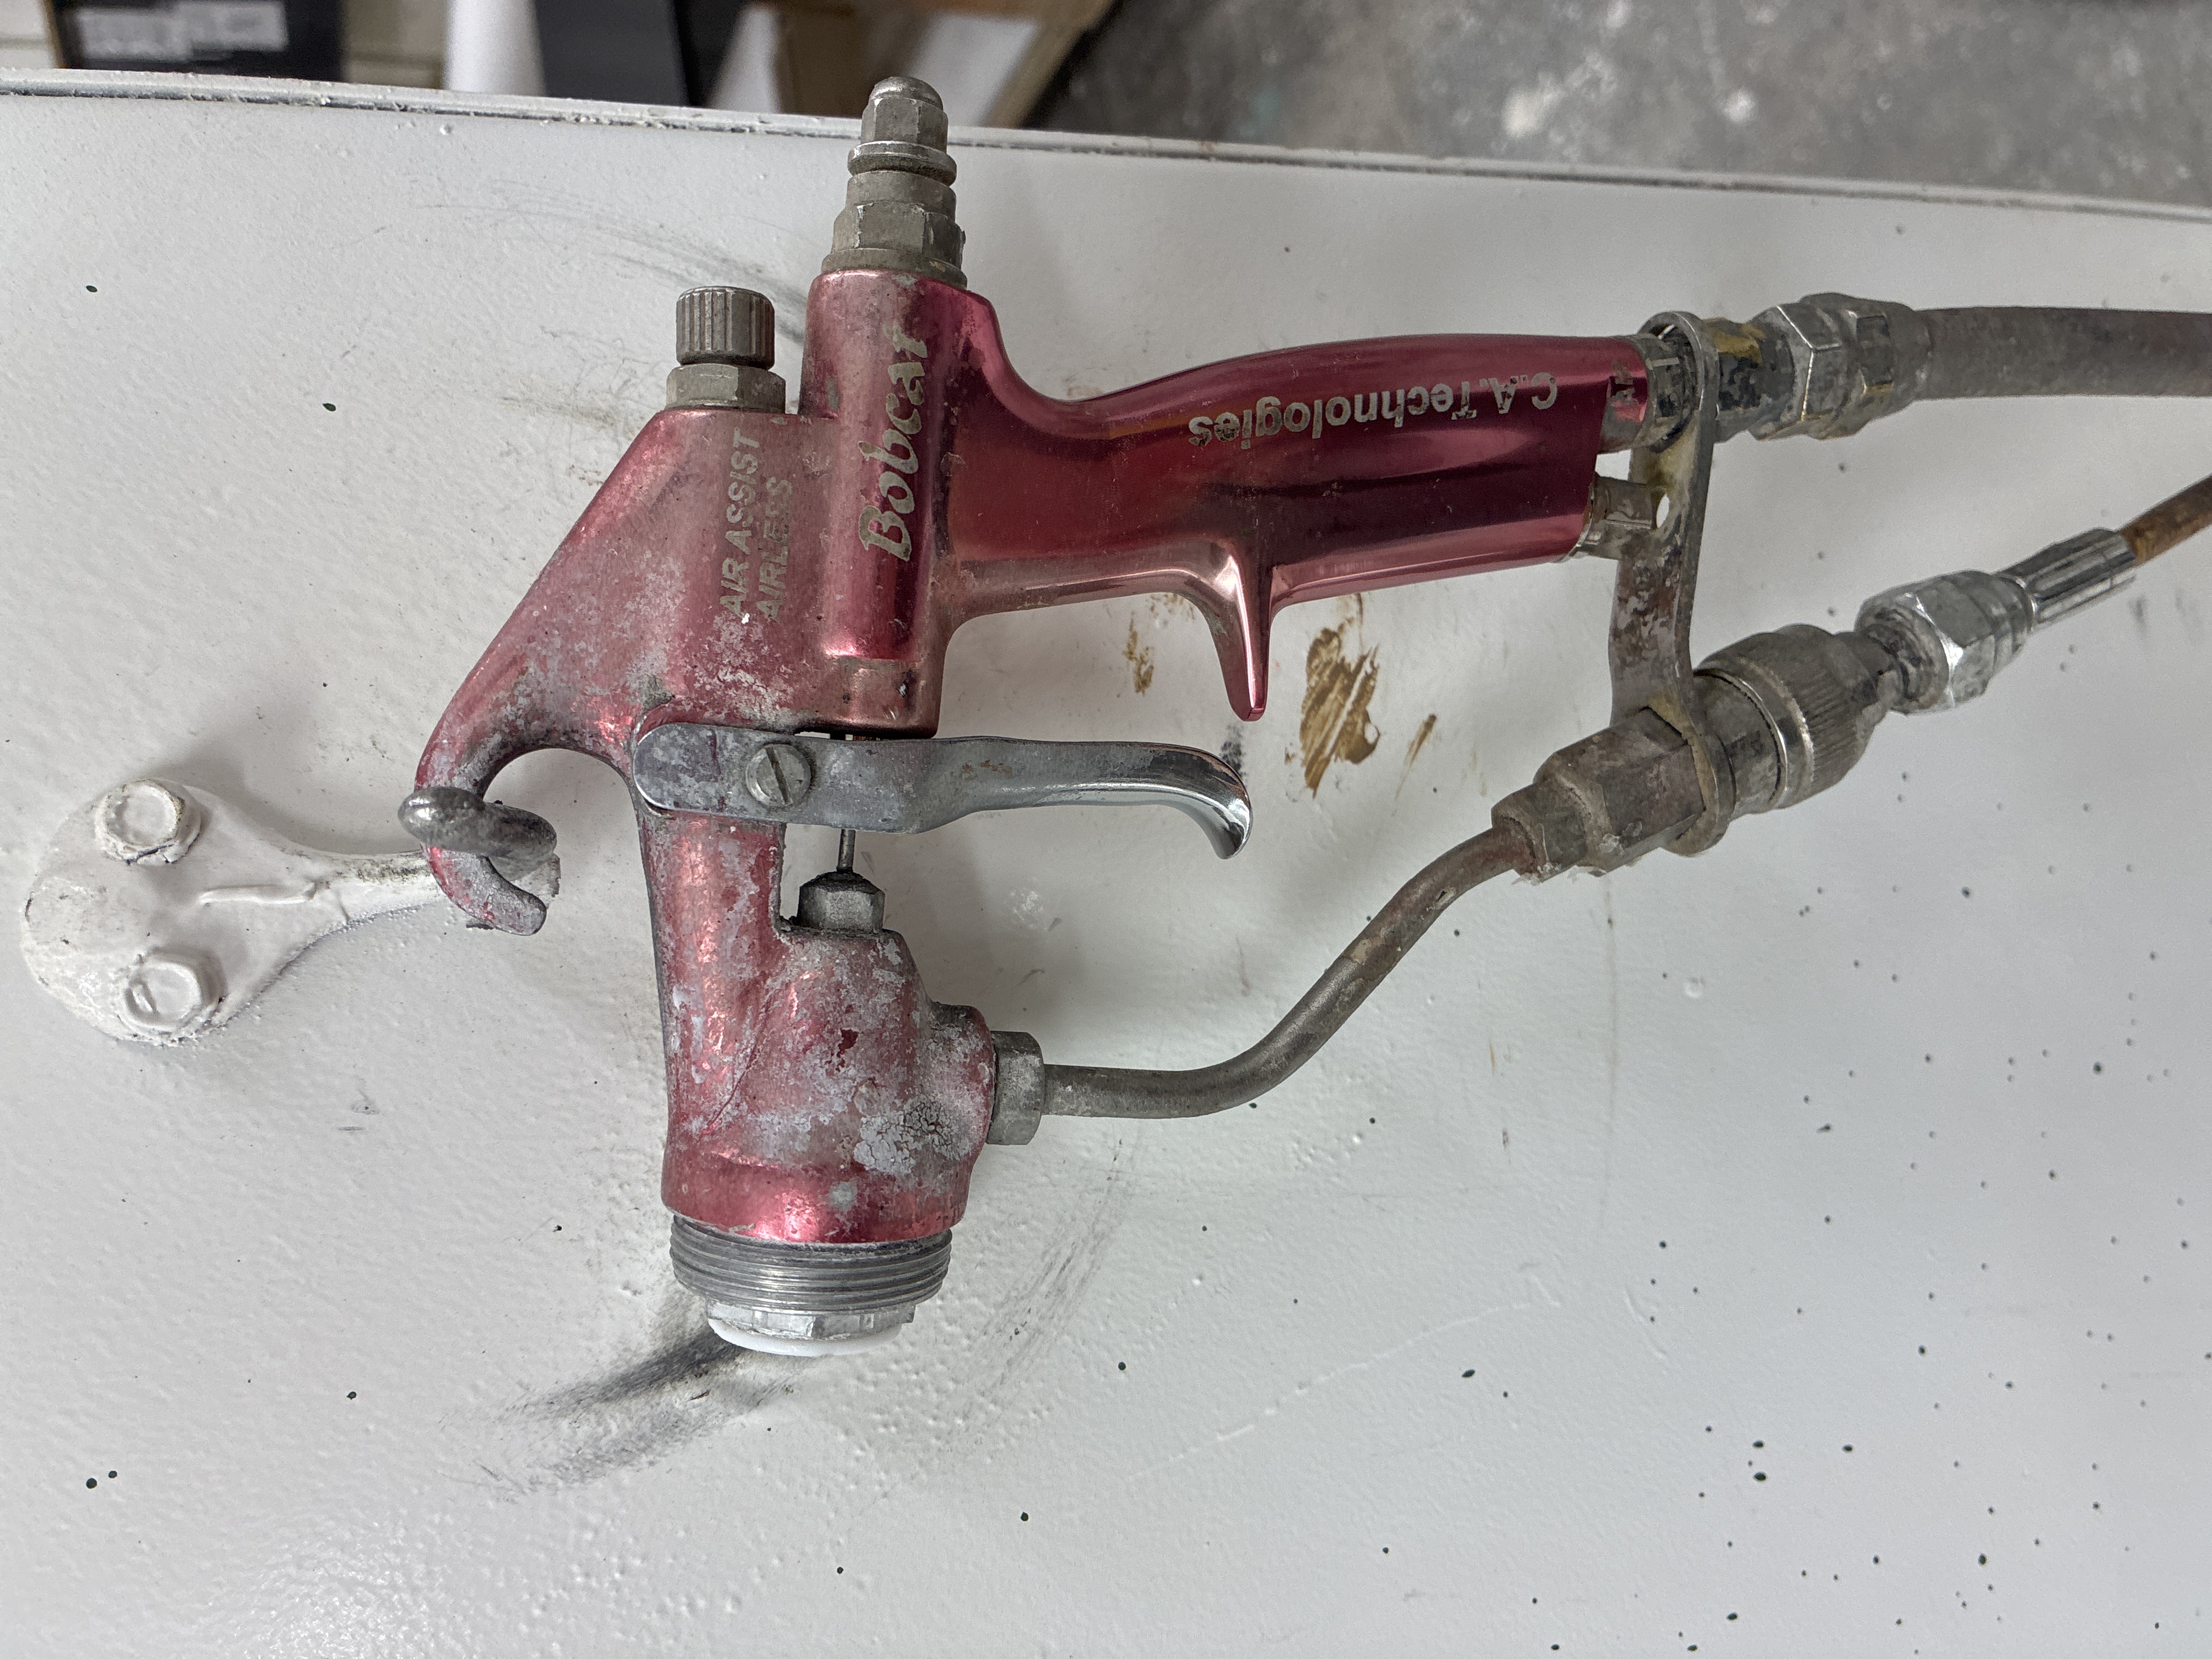
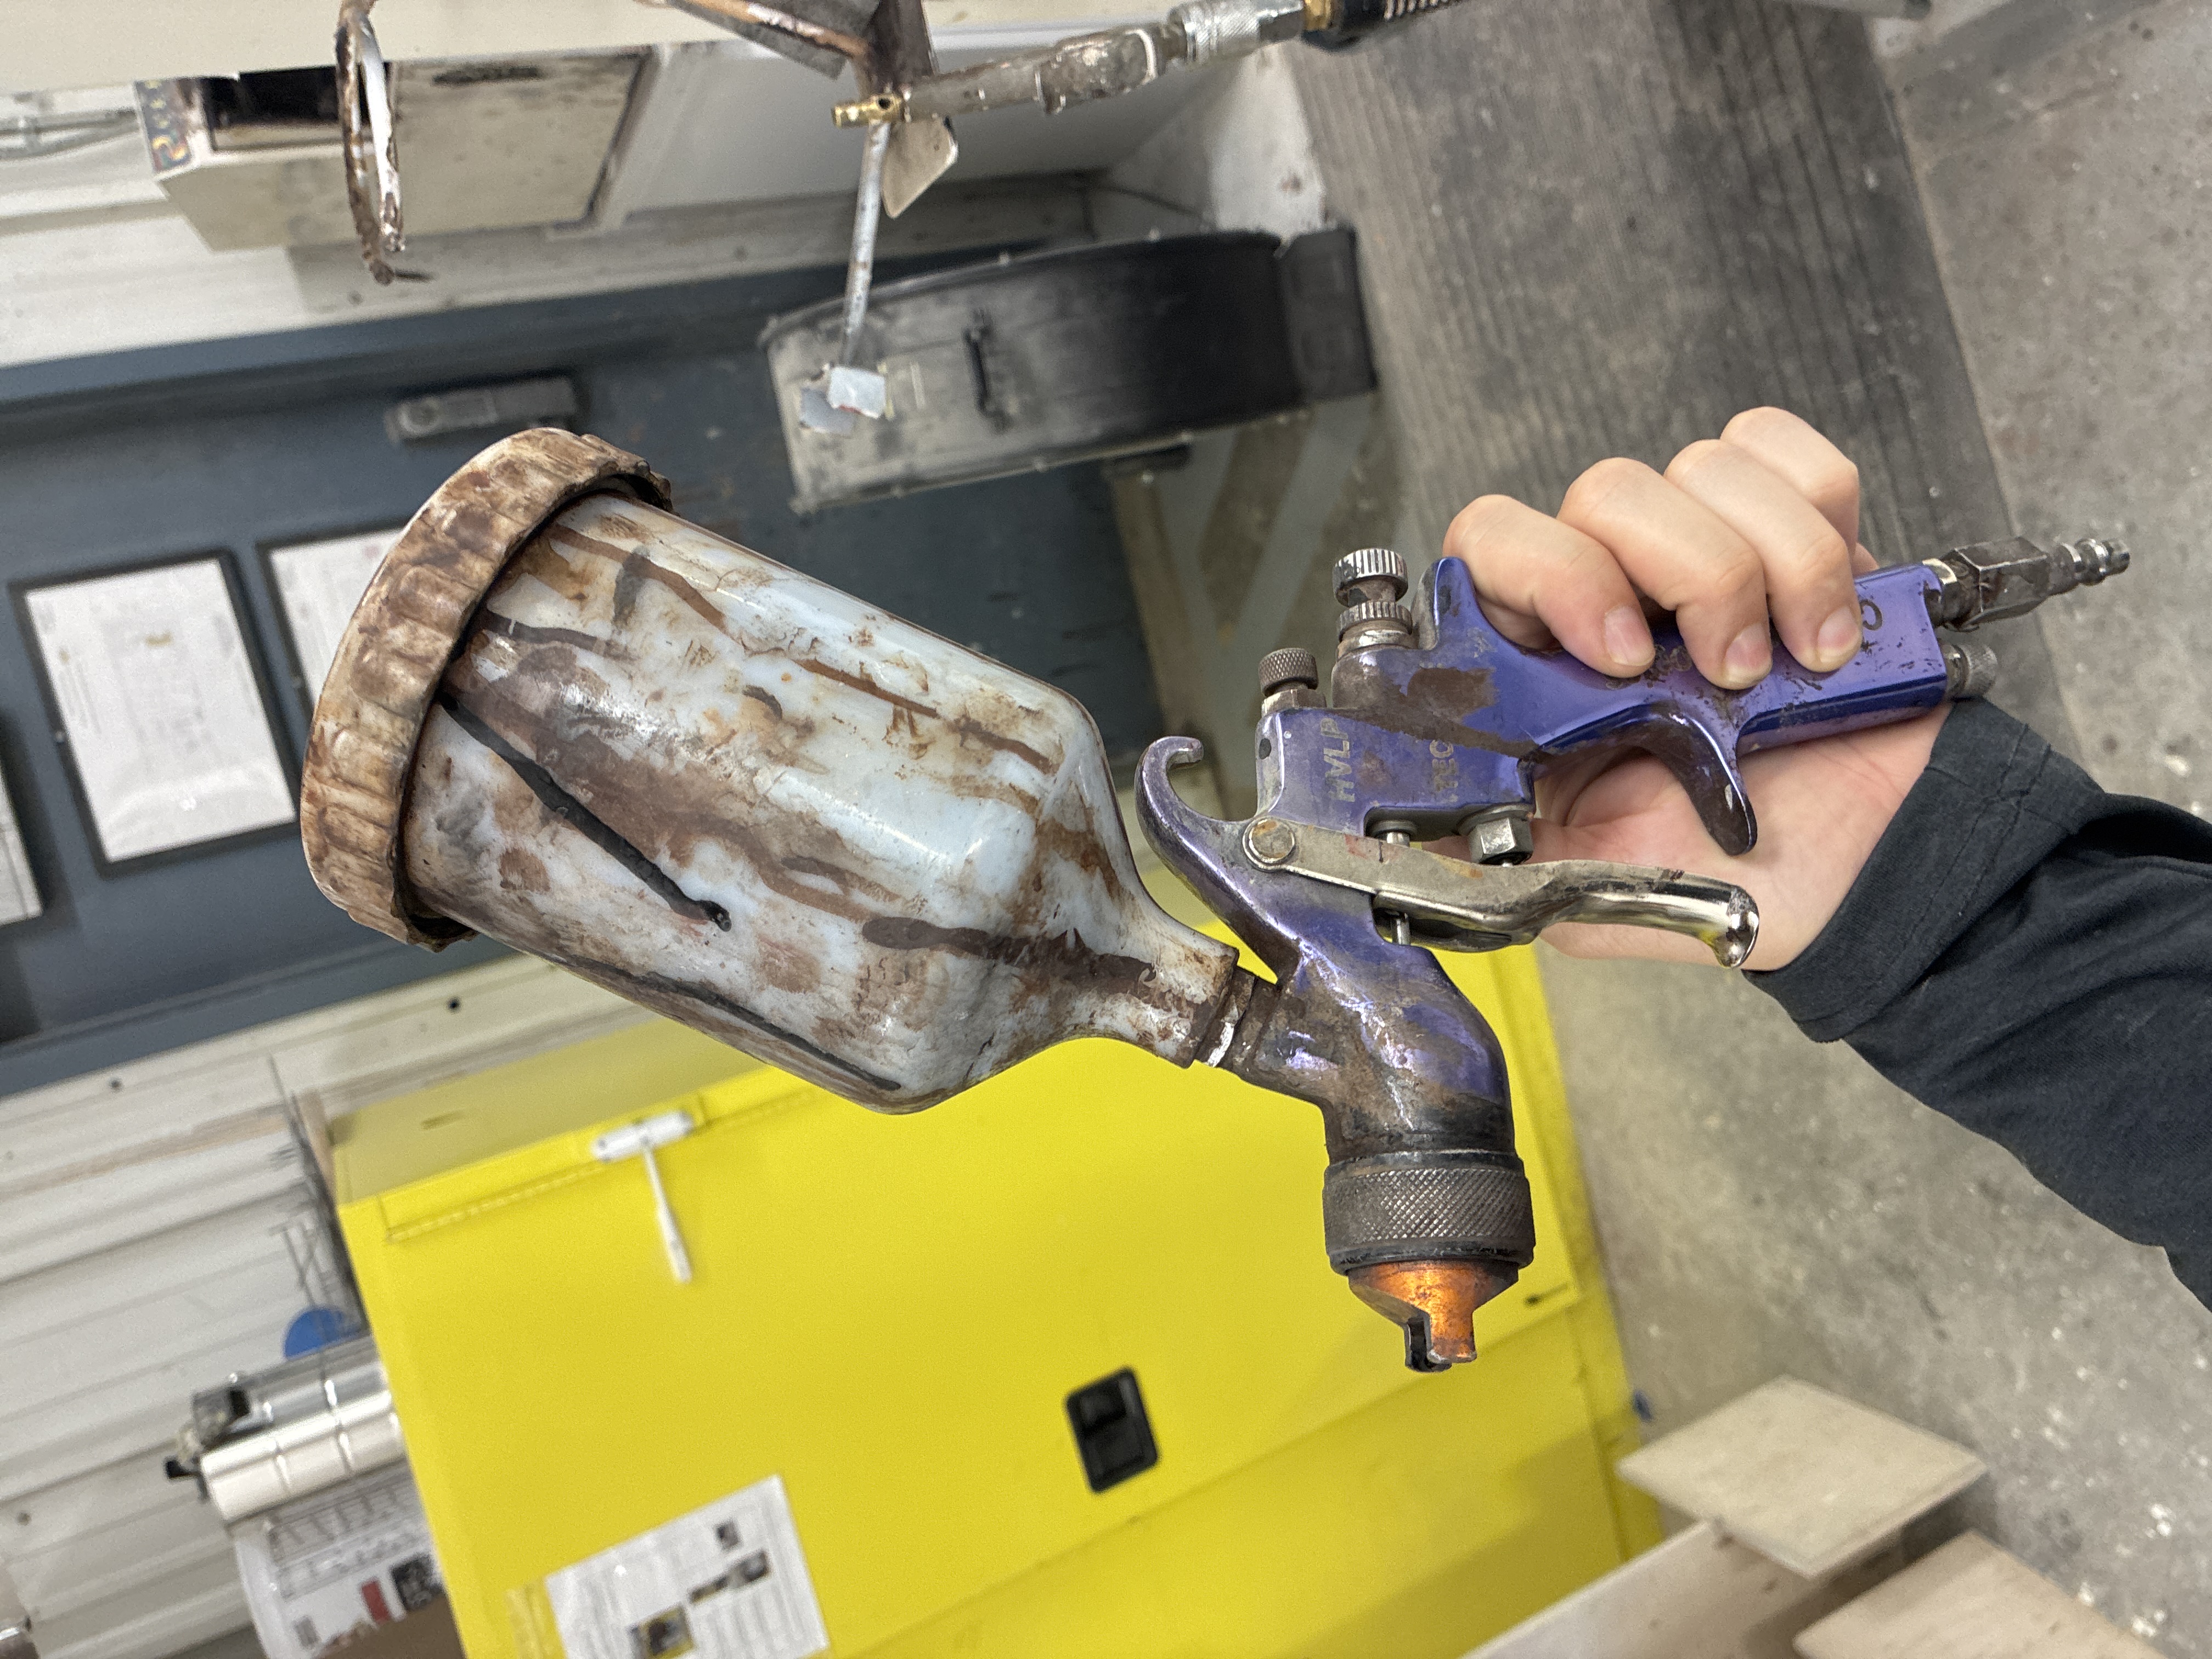
I�m somewhat new to the finish department (9 months) and I�ve been having a lot of trouble trying to train myself without anybody to teach me or certifications etc.. the biggest problem I�m having right now is some kind of solvent pop or micro bubbles or fish eyes, things like that coming up in my finish. I use a AAA CA technologies gun for spraying ML Campbell vinyl sealer and magnaklear, and for those I have the bobcat with only one sized tip. Almost all the stains I use are from ML and I do all of the color matching in house with mineral spirits. That�s a whole thing in itself that I�m slowly learning how to do. Like I said, I don�t have anybody here to teach me how to do this and I�m kind of learning by trial and error, but there are some errors that I keep coming across which I have not been able to find a permanent solution for. Most of the solid pop and micro bubbles. I have been able to solve by putting butyl acetate in the magnaklear but today�s issue was attempting to put black coloring into topcoat of a gravity gun since I didn�t want to ruin my only AAA; and spray black magnifier mix through the cup gun, which worked really well on the smaller pieces that I had but anything more than 12 ft.� is a real pain in the ass to try and drag the cup gun evenly across and spread it perfectly. It doesn�t help that a couple months ago the fan in the fan booth speed regulator has broken so I only have a fan at 100% or 0% so things are drying very quickly and most of the spray is getting sucked towards the fan, which is pretty huge. The entire booth is about the size of a studio apartment. We do lots of mass production at the shop, but I can generally get away with somewhat subpar quality for the industrial commercial jobs but that�s not really what I�m aiming for. I want to be good at this and I would really appreciate any and all tips and help for Things like toning shading glazing. I�ve gotten a hold of a couple of friends who are also in woodworking and wood finishing, but all of them do residential stuff and have never really touched the kind of equipment that I�m messing with here. I�ve been going to the forum here for a couple months, trying to make sense a lot of of it, but most of these terms techniques tools, and so forth are way above my reference of knowledge. That being said, thank you in advance for any and all help.
View higher quality, full size image (4032 X 3024)
View higher quality, full size image (4032 X 3024)
View higher quality, full size image (4032 X 3024)
4/23/25 #3: New to finish dept ...
in your last photo you have the pickup tube sitting in an open can. I would get a mixer which sits on top of the can and also keeps debris out.
also get your variable speed fan fixed and invest in some different size tips for your gun.
4/23/25 #4: New to finish dept ...
Hey Chris. So the shop manager has had a few electricians and HVAC ppl come look at the VFD and attempt to replace it and/or fix it. I honestly need to get the entire sprayer setup serviced. I�m familiar with magnum sprayers but never used AAA�s before.
Pics posted are the 3 guns I use here at the shop.
View higher quality, full size image (4032 X 3024)
View higher quality, full size image (4032 X 3024)
View higher quality, full size image (4032 X 3024)
4/24/25 #5: New to finish dept ...
Hello Will, hopefully as you learn more and gain experience you will get better at finishing along the way. Stay on the shop manager until you can regulate your air flow. I see you use CA Technologies spray guns. We use a few of these guns too, but different styles than yours. Chris is right when he says invest in multiple tips. I find the right needle matched to the right tip, and the correct air cap makes a big difference when spraying different products. See if the information for these guns is still around and start learning which setups you need for your guns. You can also find gun diagrams online. If you can't I'll see if I can find the website for you. And if you don't know how to, get comfortable breaking down your guns for cleaning and to inspects your needle seals, and miscellaneous washers and seals. My CATs are finicky and require periodic reworking. To minimize downtime I keeps a parts board by my spray bench with my spare important parts, and extra needles, and instructions for which products they are to be used with. Good luck to you.
4/25/25 #6: New to finish dept ...
a couple of thoughts do u soak the aircap, if so, stop, here is why
when u drop the air cap into a jar of solvent,, it disturbs all the sediment in the bottom of the container. it will over time and luck, clog the air cap especially the horns of the cap, then mostly, u will get a weird pattern not caused by the spray tip, it will drive u nutz
all u need to do is take a soft bristled brush and clean off any overspray. if u r getting a lot of overspray dirt on ur aircap, in most cases u r spraying to close to ur part and getting bounce back.. u r aircap should remain clean at almost all times except for the above or a seal defect.
good luck herb j also a vfd if faulty should only be about 300 dollars < 5hp
4/26/25 #7: New to finish dept ...
Herb tell me the model number for a 3 phase 5 hp Vfd,just not seeing they are that cheap(700-800),jim
4/27/25 #8: New to finish dept ...
Whew.......there is a lot here. I admire your desire to get good at this. I've been doing it for 30 years and was thrust into it much as you are. I'll hit some key points.
1. Vinyl sealer and magnaklear isn't the best system. (I used to work for ML Campbell and magnaklear is finicky and IMO garbage.) Vinyl sealer should be used on refinishing projects as it basically replaces shellac as a blocker. Vinyl sealer also destroys the clarity, sands like garbage etc. Magnaklear is to finicky and will maybe work, or maybe won't. Campbell never figured it out and continues to sell it. My advice, scrap all that and just switch to the HPWW conversion varnish and self seal with it. Remove 2 products prone to error and replace it with one.
2. Solvent poo.....usually occurs when temp is to hot. The top film glaze over faster than it can off Gass and the solvents "pop" through, leaving bubbles. Micro bubbles......it's being sprayed to thick and the top film glaze over faster than it can off gas, leaving micro bubbles trapped in the layers (can appear as a white, milky haze which is thousands of bubbles condensed in a tight area. Easy answer, less is more. Spray 2 thin coats instead of one heavy one. If it's to hot, use retarder (no more than 10% per gallon or it will change the sheen and not dry right.
3. Black finishes......use clawlock black primer, sand flat. Now the wood is black and coverage won't be an issue. Get 844 industrial colorants (you'll need these anyway for making your own stains). Tint the clear CV topcoat with 10 ounces per gallon of lamp black 844 colorants. Spray over the already black primed surface. Done. You're gonna have a real hard time spraying a 12 ft surface with an unpressurized gravity gun and keep it wet to avoid dry lines. Use your ca aaa sprayer. You won't ruin it. Just flush and clean it thouraggly after, or purchase a gravity feed gun with a pressurized cup to get faster flow. Gravity guns are only good for small pieces as they rely on the weight of the material to produce flow. As the material drops, the weight behind it drops, the flow drops. Big pieces are nightmares with these guns.
3. Don't use mineral spirits to make your stains. Takes forever to dry and isn't compatible anyway with dye concentrates. For colorants, use 844 industrial colorants and dye concentrates (can be purchased by your Campbell supplier) and buy untinted WS2B10 woodsong stain base. Tint as desired adding no more than 20 ounces IC per gallon and as much dye as you want. Stain base is ideal because you can combine pigments and dye in the same medium. The 844 industrial colorants can also be used to Tint your primers and clear coats as long as they are solvent base.
3. PRO TIP FOR MATCHING STAINS......90% of stains are either burnt umber or raw umber as a starting colorant. Think red and green. Burnt umber being red and raw umber being green. Always start there and everything after that is a slight tweak. Add black to darken, yellow to brighten etc.
I could go on and on, but then I'd be writing a book. I started the same way, but was fortunate to have worked under old master finishers who taught me all this using 824 universal colorants and naphtha. Last tip.......welcome to finish. It's not an exact science. We have a lot of unforseen and uncontrollable variables to contend with. You can do everything perfect and a fly will just decide to kamikaze itself into your fresh hi gloss polyester finish. Murphy will always be there to kick your door in. Have fun and good luck.
4/27/25 #9: New to finish dept ...
Glaze, shades and toners.......
You can make all these yourself with the 844 colorants.
Toner......add colorant to your clear and spray entire piece to shift a color. I hate doing this and I absolutely never do. If a job is to red, you can put a bit of green in your clear, spray it, killing the red and shifting it to brown (think camera filters, bottom color blends through a top color creating another color). I don't like it because your shifting the color as one and not evening out lights and darks....
Plus you're adding film thickness that isn't necessary. I prefer shading. A shader is basically super thinned down stain that is airbrush on and clear coated over. Example.....I make a stain that is 32 ounces stain base 3 ounces burnt umber,, 1 ounce lamp black. Stain my cabinets. The color is what I want but it's alder and some areas are lighter than other areas. I'll make a shader to even it out. I'll use straight lacquer thinner, ngr spray stain base or amazing spray stain base as my vehicle. Start with 32 ounces of that. I don't want it as strong as my stain, so I'll do the math to break the formula down. 1 ounce equals 2 tbl=6 tsp. 3 ounces of burnt umber in the stain formula, id prob only put 2 tsp burnt umber in the shader, scale the lamp black appropriately. (This is much more accurate if you do it by weight with a gram scale instead of by volume). Put the shader in a top feed gun, airbrush the colorant onto the light areas only bringing those lights up to the darks. Use #0000 steel wool to blend edges and soften areas if you went to dark. Now clear coat as normal. Job is beautiful and you didn't add any extra film thickness and coatings for no reason. I can even out and shift colors on darn near anything using this approach. Jobs to red, I'll shader green dye over it. Not dark enough, I'll just shade black over it.....on and on. It takes practice, but gives you way more control over your finish than a toner ever will.
Glazes...I ONLY glaze if I want to pop the grain a different color or want an artsy hang up in corners and profiles. Anything else can be achieved with a shader.
4/27/25 #10: New to finish dept ...
Tint loads......
There are two types of colorants, pigments and dyes. Pigments are solid and dyes are liquid. You can add as much dye as you want to a stain as it's liquid. Pigments are different. Being solid, there is a saturation point where the Pigments won't hang in suspension. Think adding sugar to tea. At a certain point the sugar won't mix and will just fall out. Stains.....no more than 20 ounces Pigments per gallon. Clears......same, bit I dont like to go to the max of 20. It effects the dry time and the way the coating sands. Never add dyes to glaze or coatings. Dyes burn in, Pigments dont.
4/27/25 #11: New to finish dept ...
Here's an example of a stain formulae. This is minwax special walnut reformulate using stain base and 844 colorants and dyes. It's done by weight with a gram scale. 100 grams of stain base and add the gram weight of each colorant to that. 100 grams is about 6 ounces of stain. You can scale that up to make as much as you want in house. Need a gallon, make a gallon. Need 6 ounces just for touch up or to stain 1 piece of scribe the installers messed up...do that. This way you don't need to purchase an entire quart of stain to do a little piece. Yoy can also tweak the formula to your wood for your job.
Click the link below to download the file included with this post.
MW_224_SPECIAL_WALNUT.pdf
4/27/25 #12: New to finish dept ...
Color codes
BU burnt umber
RU raw umber
LB lamp black
RO red oxide
QR quinachridone red
YO yellow oxide
OY organic yellow
MY medium yellow
PG pthalo green
PB pthalo blue
QV quinachridone violet
TW titanium white
BLKD black dye
YD yellow dye
OD orange dye
RD red dye
GD green dye
BLD blue dye
GIL gilsonite (niche item you really don't need)
These are the colors all distributors and manufacturers use to make stains and coatings. You can replicate any color that exists with these. Some colors rarely get used for in house tinting. A quart of pthalo blue will last me 10 years where 1 quart of burnt ber will last a month.
4/27/25 #13: New to finish dept ...
Coatimg reductions
For shading and doing a spray stain, you want a 1.0 tip. For spraying g clear and tinted topcoat, a 1.5 will is a good middle road tip. For thick primers.....a 1.8.
Primers are always to thick to spray out of the can unless you want to spend hours sanding out orange peel. Clawlock/magnaclaw (ML Campbell) or chemlife24/omni (chemcraft) you want to reduce 15% for a AAA sprayer (I think I use a .511 tip on mine) or 25% for a gravity/siphon setup. If it's lacquer based, just thin with a GOOD LACQUER THINNER.....not parts cleaner. Cheap ain't good. I've seen jobs get ruined cuz people want to buy cheap thinner. If it's conversion varnish.....you need to account for the catalyst when doing reduction. If it takes 10% catalyst per gallon, then you add 5% reducer to get 15%.
Clears really don't need reduction unless it's a unique scenario like spraying a 10 foot tall by 10 foot wide pocket door vertical to lesson orange peel. Tinted opaque coatings need 18% reduction and can be as much as 25% depending on your set up. There are all kinds of variables at play and each coating is different.
4/27/25 #14: New to finish dept ...
I hope this info helps get you started. Finishing is a dying trade and there aren't many of us left who know it in depth. It gets a lot deeper too. This is just the basics for stains and coatings. Later on you can delve into polishing, building and faux finishing if you choose. The possibilities are endless. Finishing is not an easy task, but becomes manageable with experience over time. It's a stable trade too. If you get good, you will never lack for a good paying job anywhere you go. Cabinet makers are a dime a dozen....finishers are about 1 in a thousand and less every year. Good luck!!!
4/27/25 #15: New to finish dept ...
One last thing......on painted finishes, you really really want to be tinting your primer to the same color as the topcoat. That way when the installers damage your work(and they will) you wont have glaring bright white primer drawing attention to the damage. Easier to touch up too.
4/27/25 #16: New to finish dept ...
Looks like this is what I'm doing today, just trying to help a new finisher out. Let's talk touch ups on stained wood pieces. Wax sticks, stain markers and burn ins are absolute garbage and would never fly on high end furniture. Those 844 industrial colorants.....you can faux paint with them. Scratch the wood. I'll bondo that scratch, take my colorants and faux paint it to look like it never happened and respray it in. It takes a lot of hair pulling and frustration to get good at it, but when you do, you become the magic man. Don't become to good though, then people will start being lazy and damaging everything knowing you can fix it. On painted finishes. Unfortunately, in my world artist brush touch ups are not acceptable. You scratch and damage something, it's full on bondo, sand and respray every time. People pay high dollar for custom cabinets with custom finishes and deserve to have a good product. Not some hacked up thing with dabs of paint touch up everywhere. Thays my philosophy anyway.
4/27/25 #17: New to finish dept ...
Herb J the VFD part was ordered and replaced ASAP. However there seems to be some issue with the wiring. The vfd wont communicate with the control board. A couple electricians that checked it out believe it�s something to do with the fire suppression system. As little as I know about finishing, I know even less about electrical work. My background is in house painting so some of the skills and technique carry over like prep work and attention to detail.
4/28/25 #18: New to finish dept ...
AUTOMATION DIRECT
GS13N-45P0
starstarstarstar three quarter star Reviews 21
DURApulse GS10 series AC micro drive, enclosed, 460 VAC, 5hp with 3-phase input, SVC or V/Hz mode, C1 frame, RS-485, integrated dynamic braking.
Support Resources and downloads.
Support Resources Downloads
Software, Firmware, Configuration files and other resources.
In Depth Product Information
For complete product family overview and details,
see the In-Depth section.
Product Category Overview
Go to the Product Overview for this category.
submit application story
Submit an Application Story about this item.
4/29/25 #19: New to finish dept ...
Thanks herb
4/30/25 #20: New to finish dept ...
ALSO far from electrician, but the fire suppression is supposed to shut down fan in the event of something bad in booth, my guess and only a guess, it is probably a normally open contact that when the fusible link, a device that sort of melts upon excess heat, triggers a closes the contact on the control panel, again far from an electrician
|

